Getting started with AWX - A beginner's guide

This post aims to be an introduction to AWX - a tool from Ansible that aims to make using Ansible a little easier. AWX can be a complicated subject, and precious little exists on the wider web documenting how to use it, so I thought I'd help improve that a little. It'll cover installing AWX on Kubernetes, getting TLS/SSL certificates for most common setups, then actually using AWX for a small automation project.
First off, what's AWX? It's the open source "upstream" version of Ansible Tower, intended for development and power users. It allows you to spawn and control instances of Ansible and use them to control sets of machines and collect reports and other data from them. AWX is one of my favourite tools, as it provides a really powerful but easy-to-use interface for managing Ansible playbooks and automation tasks, inventory and more.
A caveat you should be aware of: AWX is not recommended for production - officially - but can be used as such, as long as you're willing to keep in mind that you may at some point need to tear it down and rebuild it. In practice, it's solid and reliable software already, just don't build your business around a "production" AWX instance and then cry to Red Hat when you run into issues 🙂
Installation
Getting AWX installed has gotten a little harder since the project launched, if you don't consider Kubernetes easy (most don't). Previously, you could use Docker-Compose to install it - which is technically still an option, but in AWX's case, a bad one. I won't cover the process of getting Kubernetes installed in this post, but I will cover the process of installing AWX and getting certificates provisioned for it (for both DNS-01 and HTTP-01 challenges).
You'll need the following before you start:
- A working Kubernetes cluster
- A "management machine" with Helm, Kustomize and kubectl installed, configured to manage your Kubernetes cluster
- A domain if you want to use TLS, otherwise skip the cert-manager and certificate sections.
cert-manager
You'll want to get cert-manager installed ahead of doing anything else, unless you've got a different way of getting TLS certificates already.
Start by installing cert-manager with Helm.
You'll want to add the repository:
helm repo add jetstack https://charts.jetstack.ioThen update it to grab the latest versions:
helm repo updateThen, finally, install cert-manager.
helm install cert-manager jetstack/cert-manager \
  --namespace cert-manager \
  --create-namespace \
  --version v1.8.0 \
--set installCRDs=truecertificates
Next, you'll want to create a ClusterIssuer for your chosen method of getting a TLS certificate, and associated keys needed to get it working.
Option A - HTTP-01:
The HTTP-01 solver is the simpler challenge of the two I'll cover in this post, but requires that your AWX server is exposed to the internet to issue and renew the certificate. If that's you, great! (Otherwise, use the Cloudflare challenge below this one).
Create a manifest, issuer.yaml, and populate it with the following contents.
---
apiVersion: cert-manager.io/v1
kind: ClusterIssuer
metadata:
  name: letsencrypt-prod
spec:
  acme:
    server: https://acme-v02.api.letsencrypt.org/directory
    email: example@protonmail.com
    privateKeySecretRef:
      name: letsencrypt-prod
    solvers:
      - http01:
ingress: { }PS: If you're using Nginx Ingress, you'll want to change "ingress: { }" to look like this:
          ingress:
class: nginxOption B - Cloudflare (DNS-01):
Create a manifest, issuer.yaml, and populate it with the following contents. The first email field should be filled with the email you want to use for Let's Encrypt, and the second email field should be filled with your Cloudflare email account - they can be different emails, but your Cloudflare email must match, or you'll be trying your API key against some random's account.
---
apiVersion: cert-manager.io/v1
kind: ClusterIssuer
metadata:
  name: letsencrypt-prod
spec:
  acme:
    server: https://acme-v02.api.letsencrypt.org/directory
    email: example@protonmail.com
    privateKeySecretRef:
      name: letsencrypt-prod
    solvers:
      - dns01:
          cloudflare:
            email: example@protonmail.com
            apiTokenSecretRef:
              name: cloudflare-api-token
key: api-tokenApply the manifest using kubectl apply -f issuer.yaml.
Next, you'll need to craft a manifest with an API token from Cloudflare with permissions to manage your DNS zones. It will need Zone -> Zone -> Read and Zone -> DNS -> Edit permissions for the domain you want to use it with (feel free to contact me if you have trouble with this step or any others). Once you've got your API token, create a new manifest with it, which we'll call cloudflare.yaml.
apiVersion: v1
kind: Secret
metadata:
  name: cloudflare-api-token
type: Opaque
stringData:
api-token: YOUR-TOKEN-GOES-HEREApply the manifest - this time, however, we'll put it into a particular namespace - kubectl apply -f cloudflare.yaml --namespace=cert-manager.
Requesting the certificate
Now that we have a (hopefully) functioning ClusterIssuer, we can request a certificate.
Create one last manifest, certificate.yaml, with the following contents:
---
apiVersion: cert-manager.io/v1
kind: Certificate
metadata:
  name: tls-awx-ingress
  namespace: awx
spec:
  secretName: tls-awx-ingress
  commonName: awx.windowpa.in
  dnsNames:
  - awx.windowpa.in
  issuerRef:
    name: letsencrypt-prod
    kind: ClusterIssuer
You can change the name and/or secretName as you desire, but the important bit will be to change "awx.windowpa.in" to your own value, such as "awx.homesprocketstore.com".
Once you've got your manifest created, apply it with kubectl apply -f certificate.yaml and watch the magic.
You can run kubectl get certificates to see your certificate request, and kubectl describe certificates to see what state it's in.
wings:homelab-dns/ $ kubectl get certificates
NAME              READY   SECRET            AGE
tls-awx-ingress False tls-awx-ingress 20sYou may also want to run kubectl get challenges and kubectl describe challenges to see the status of the actual ACME challenges used to issue the certificate, especially if you wind up having trouble getting certificates.
After a while, you should get a valid certificate:
wings:homelab-dns/ $ kubectl get certificates
NAME              READY   SECRET            AGE
tls-awx-ingress True tls-awx-ingress 3mAWX Operator
With certificates ready to go, we're now ready to get AWX up and running. It's essentially a two-step process - install the AWX Operator, then create "an" AWX. Wait, "an" AWX? Well, yes - the operator allows you to spawn an arbitrary number of AWX instances, imaginatively called "AWXs", but we'll only need one today.
You'll want to read the install instructions for AWX Operator, but I'll provide a condensed version here for reference.
- Find the latest version of AWX from https://github.com/ansible/awx-operator/releases and note it down (currently 0.21.0)
- Create a new "kustomization.yaml" manifest and populate it as follows (replacing 0.21.0 if there's a newer version available when you read this):
apiVersion: kustomize.config.k8s.io/v1beta1
kind: Kustomization
resources:
  # Find the latest tag here: https://github.com/ansible/awx-operator/releases
  - github.com/ansible/awx-operator/config/default?ref=0.21.0

# Set the image tags to match the git version from above
images:
  - name: quay.io/ansible/awx-operator
    newTag: 0.21.0

# Specify a custom namespace in which to install AWX
namespace: awx- Apply the manifest with
kustomize build . | kubectl apply -f - - After a bit of waiting, you should see some AWX Operator pods happily running.
wings:homelab-dns/ $ kubectl get pods -n awx
NAME                                               READY   STATUS    RESTARTS        AGE
awx-operator-controller-manager-57d56b64db-kfcjf   2/2     Running   0               3m
You've just installed AWX Operator. Crack open a beer or put on a coffee, you've earned it.
AWX itself
Finally, we can create an AWX instance.
Create a manifest, awx.yaml, with the following contents:
---
apiVersion: awx.ansible.com/v1beta1
kind: AWX
metadata:
  name: awx
spec:
  service_type: nodeport
  ingress_type: ingress
  hostname: awx.windowpa.in
  ingress_path: /
ingress_tls_secret: tls-awx-ingressAnd apply it with kubectl apply -f awx.yaml.
After a few minutes, you should have a working AWX installation at the hostname you specified:
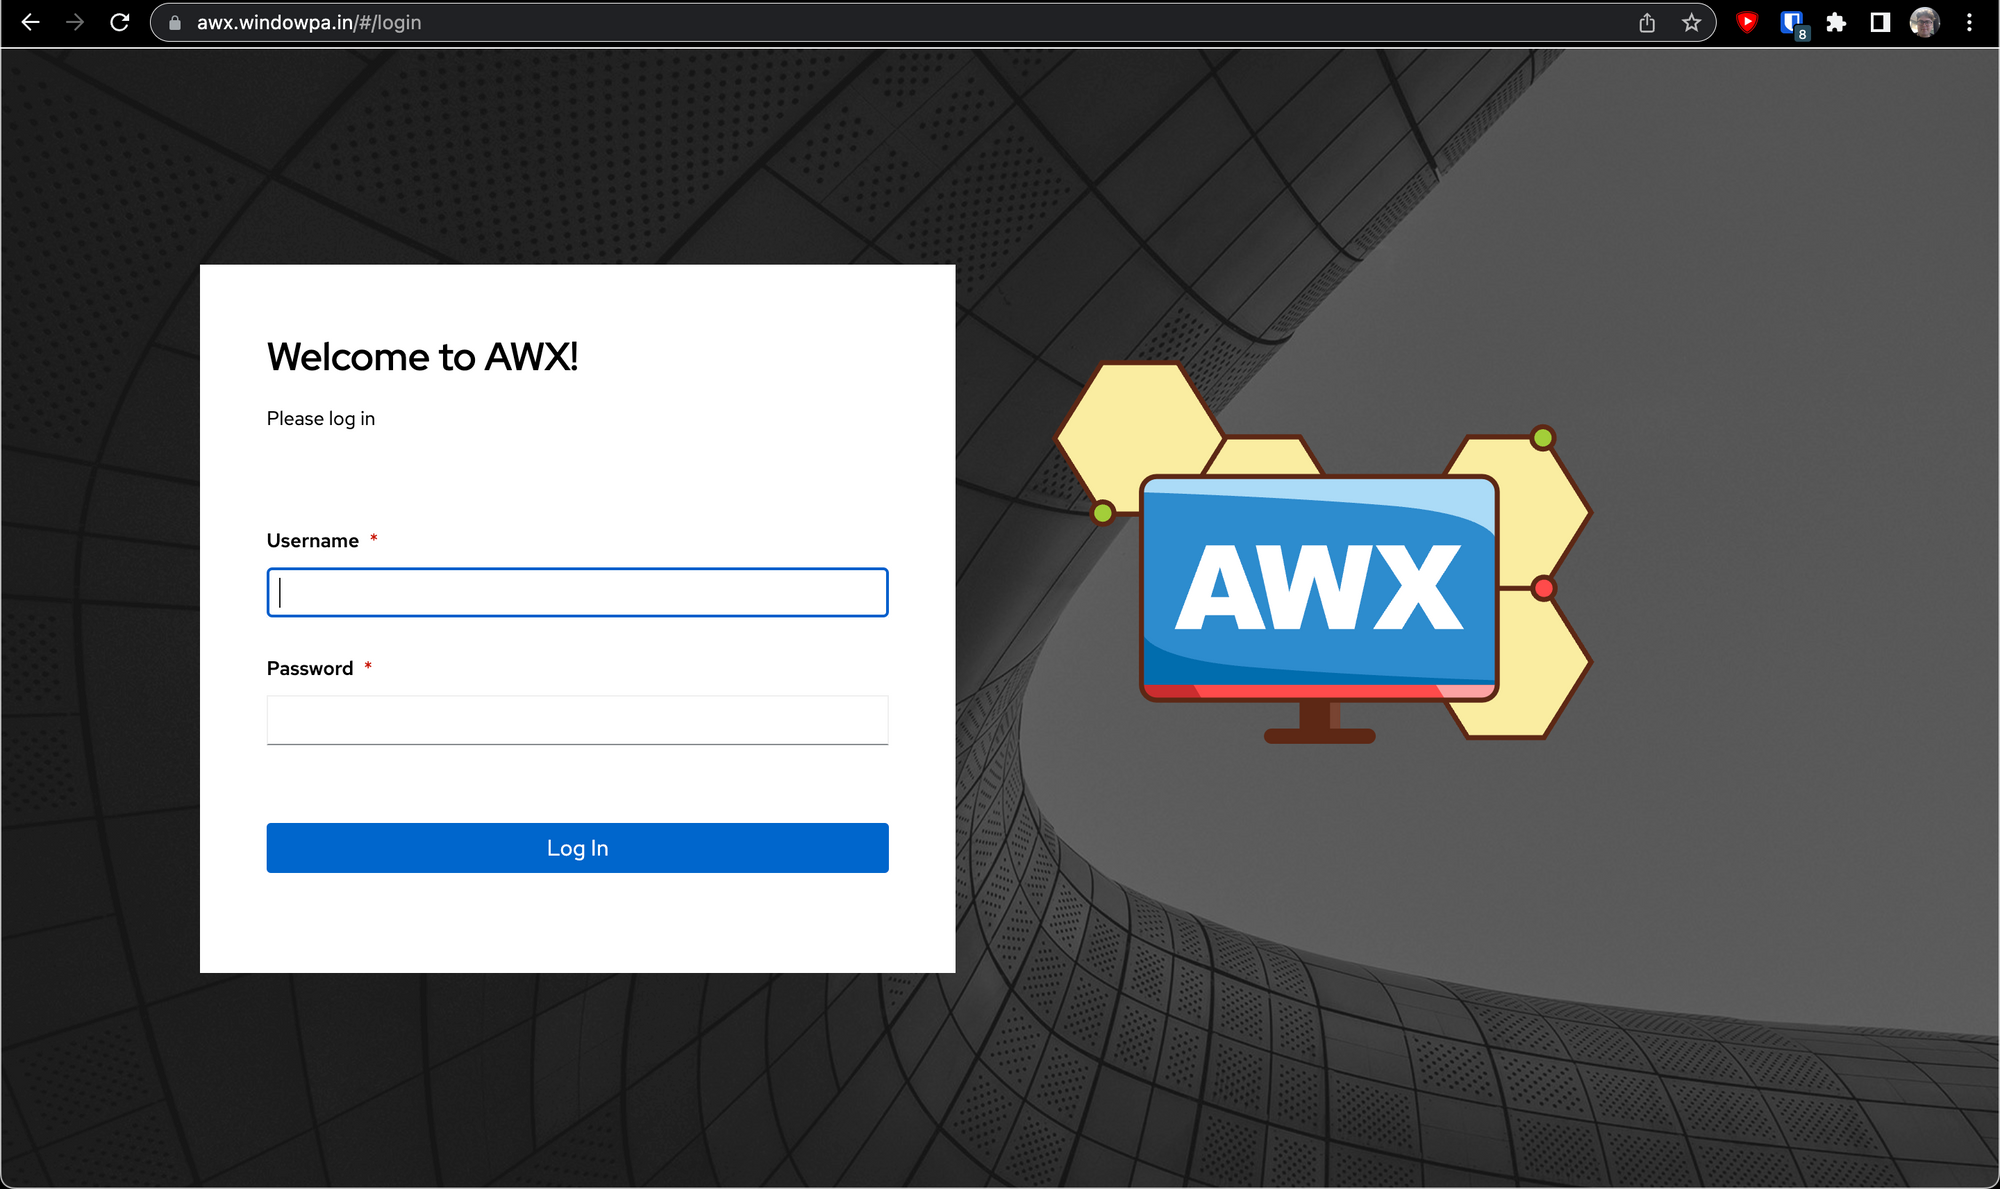
You can grab the login password using kubectl get secret -n awx awx-admin-password -o jsonpath="{.data.password}" | base64 --decode - which should give you your password. The username will be admin. You can of course change this password once you're logged in.
Congrats, you've installed AWX!
First steps
Now that you've got a working AWX installation, you'll want to run some playbooks. There's an example project and template (some AWX terminology I'll try my best to explain) included which allow you to test out the basic functionality of running jobs, but I'll assume you want to actually run something useful.
Git access
The first port of call is to setup some Git credentials (or more generically, SCM credentials) so that AWX can talk to your Git host of choice (Bitbucket, GitHub, GitLab etc). This can be an internal server or a public server - anything that talks Git is fair game. (NB: Git isn't the only supported SCM on AWX, just the most popular.)
We'll start by creating a keypair. You'll want to choose a strong passphrase, since AWX will remember it and use it automatically (so you might as well! Free security!)
wings:~/ $ cd ~/.ssh
wings:.ssh/ $ ssh-keygen -f awx_github
Generating public/private rsa key pair.
Enter passphrase (empty for no passphrase):
Enter same passphrase again:
Your identification has been saved in awx_github
Your public key has been saved in awx_github.pub
The key fingerprint is:
SHA256:RxQC/wrR68KFcyzc1tCRqMaGowR2gFWMpEYk6t/yXLg wings@trevor
The key's randomart image is:
+---[RSA 3072]----+
|+*++. ....+o     |
|*o...  o.+..     |
|+o.  o..+ o      |
|o . o.== *       |
| o . +* S +      |
|  o ...O o       |
|   o oo.o        |
|    + o.         |
|     E           |
+----[SHA256]-----+Once you have your keypair and passphrase, save them securely in a password manager or some other good location, then we'll install them in AWX for usage.
Go to Resources -> Credentials, then click on Add.
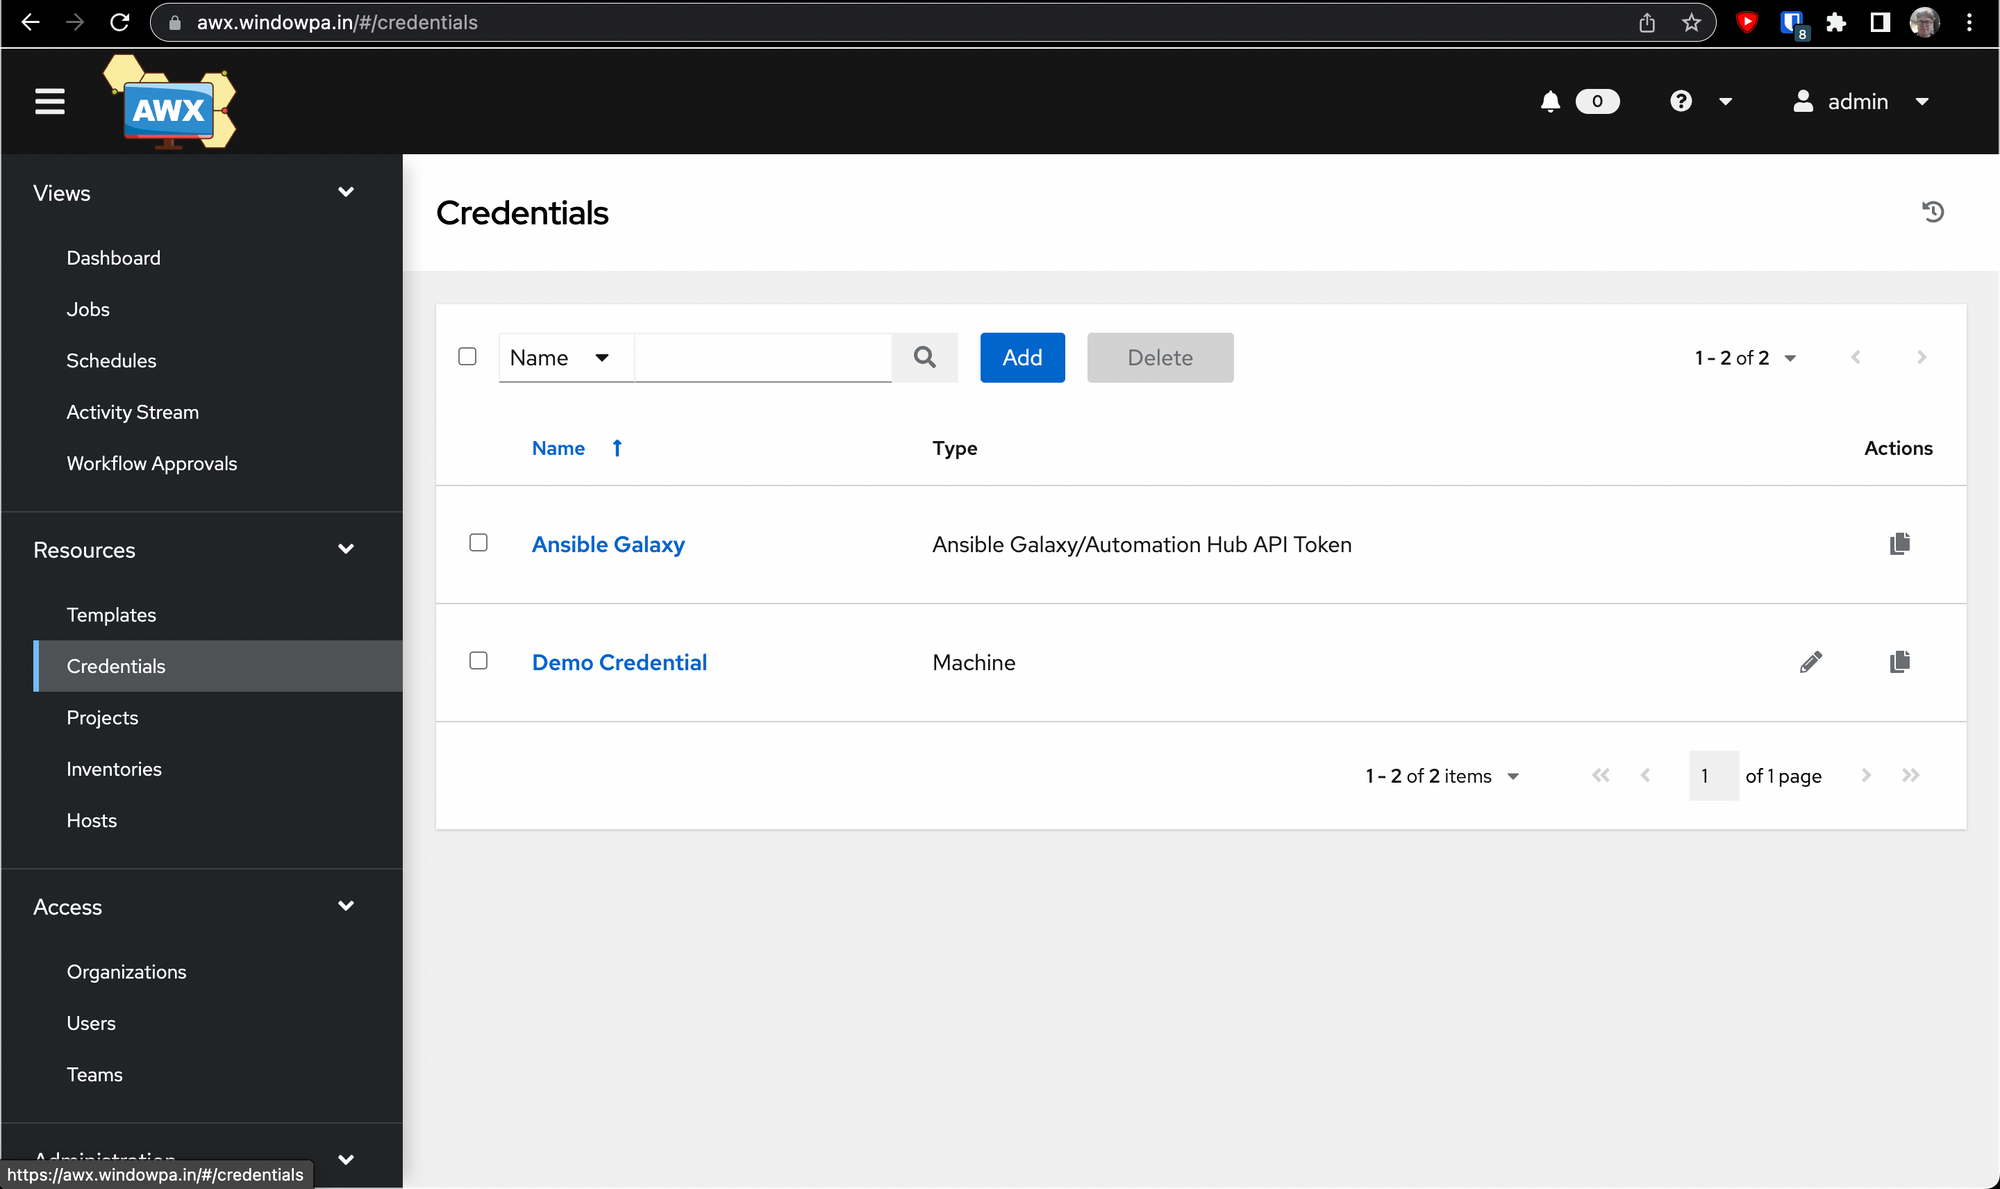
You'll want to select Source Control from the dropdown, then fill out the wizard.
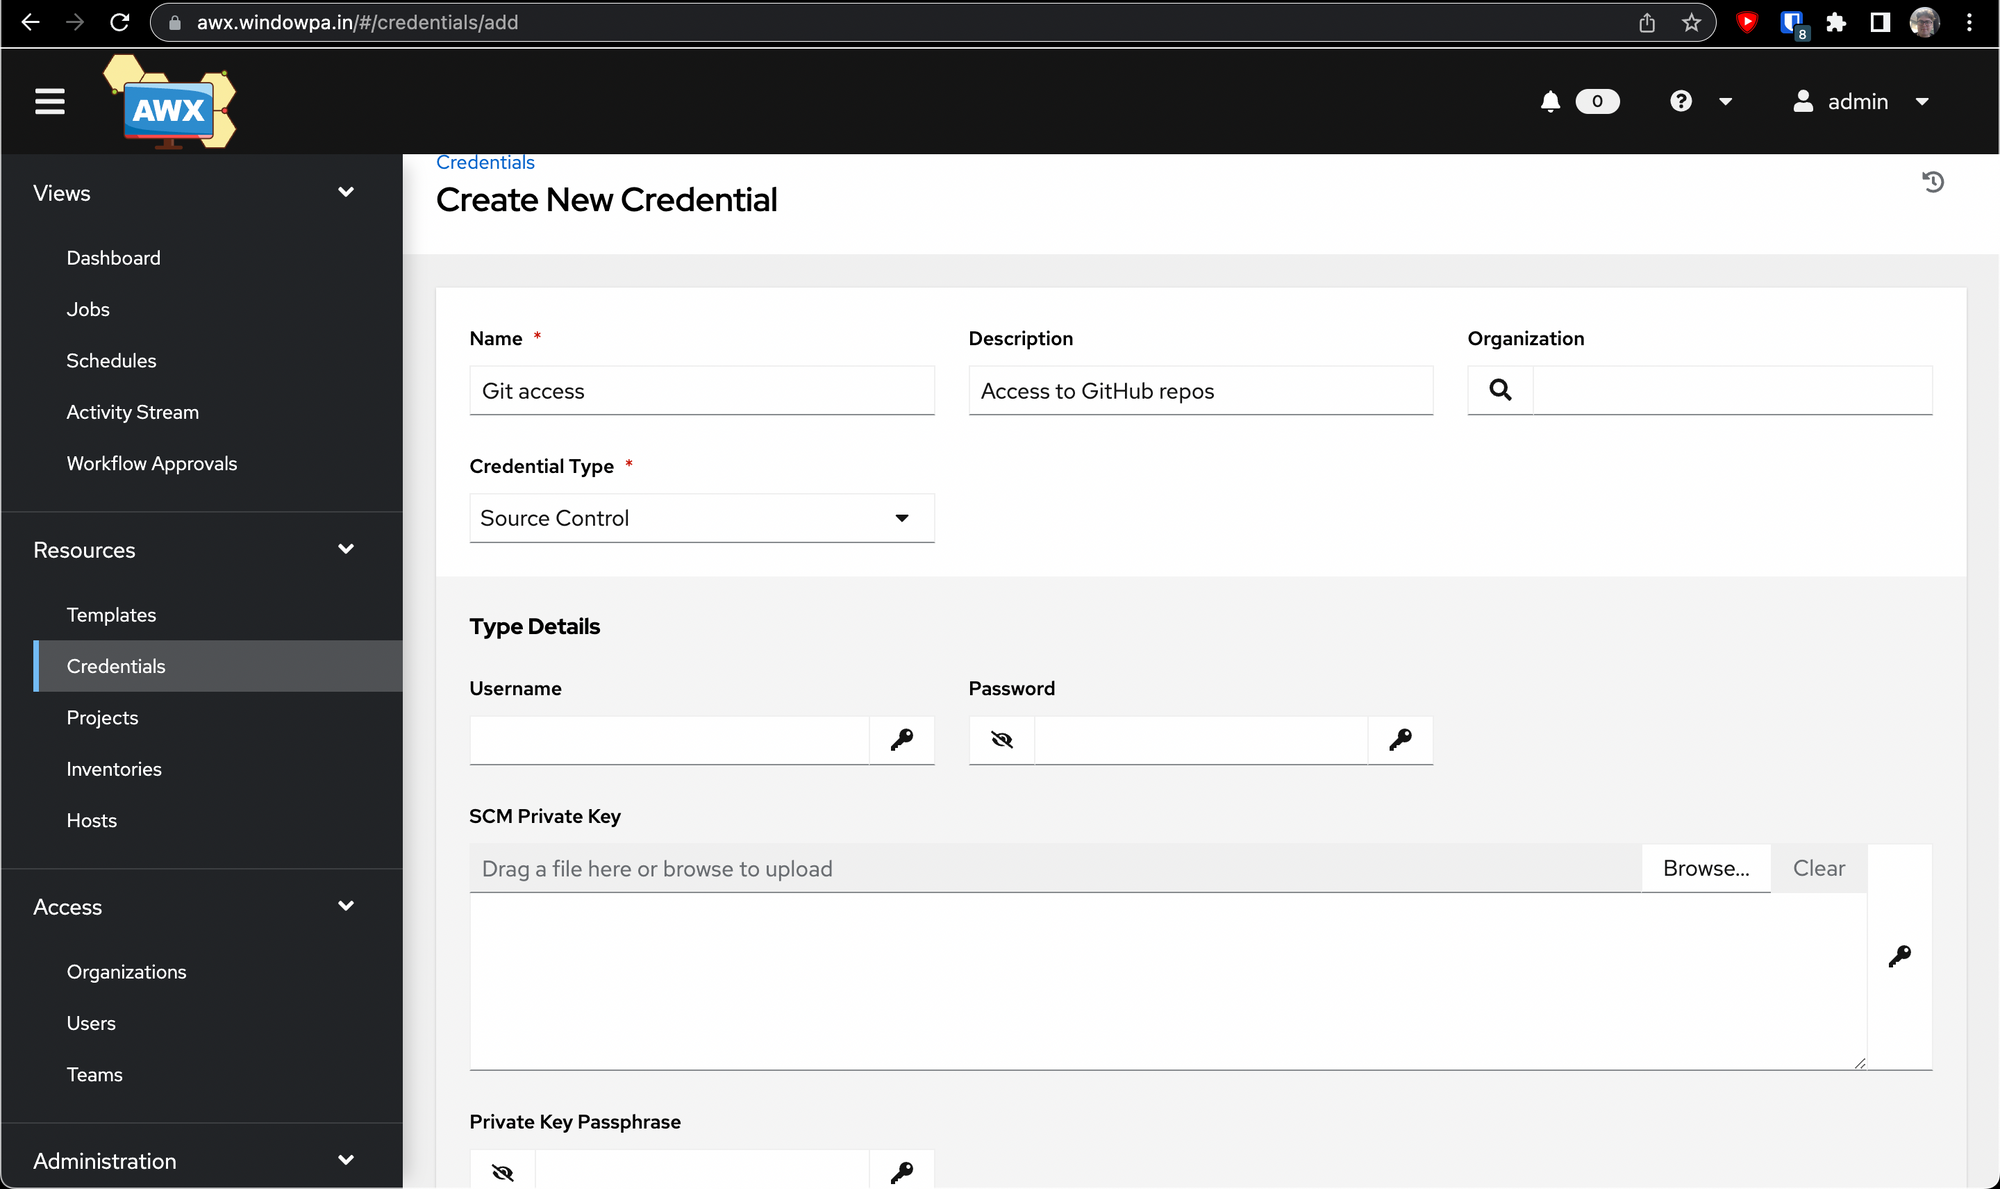
You'll want to leave Username and Password blank here, and drop your private key into the SCM Private Key field and your passphrase into the Private Key Passphrase field.
Hit "Save", then go to GitHub (or whatever platform you're using) and either add the public key (hint: cat awx_github.pub) to your account, or (more securely) add it as a Deploy Key to each individual repository you want to use.
Machine credentials
Next up, we'll create the login credentials we use to login to the machines. You can create a "placeholder" credential of sorts, which will logon as some username but prompt you for the password - perfect for the password rotation use case. You create this the same way as the Git access credentials, but select "Machine" instead of "Source Control" for Credential Type.
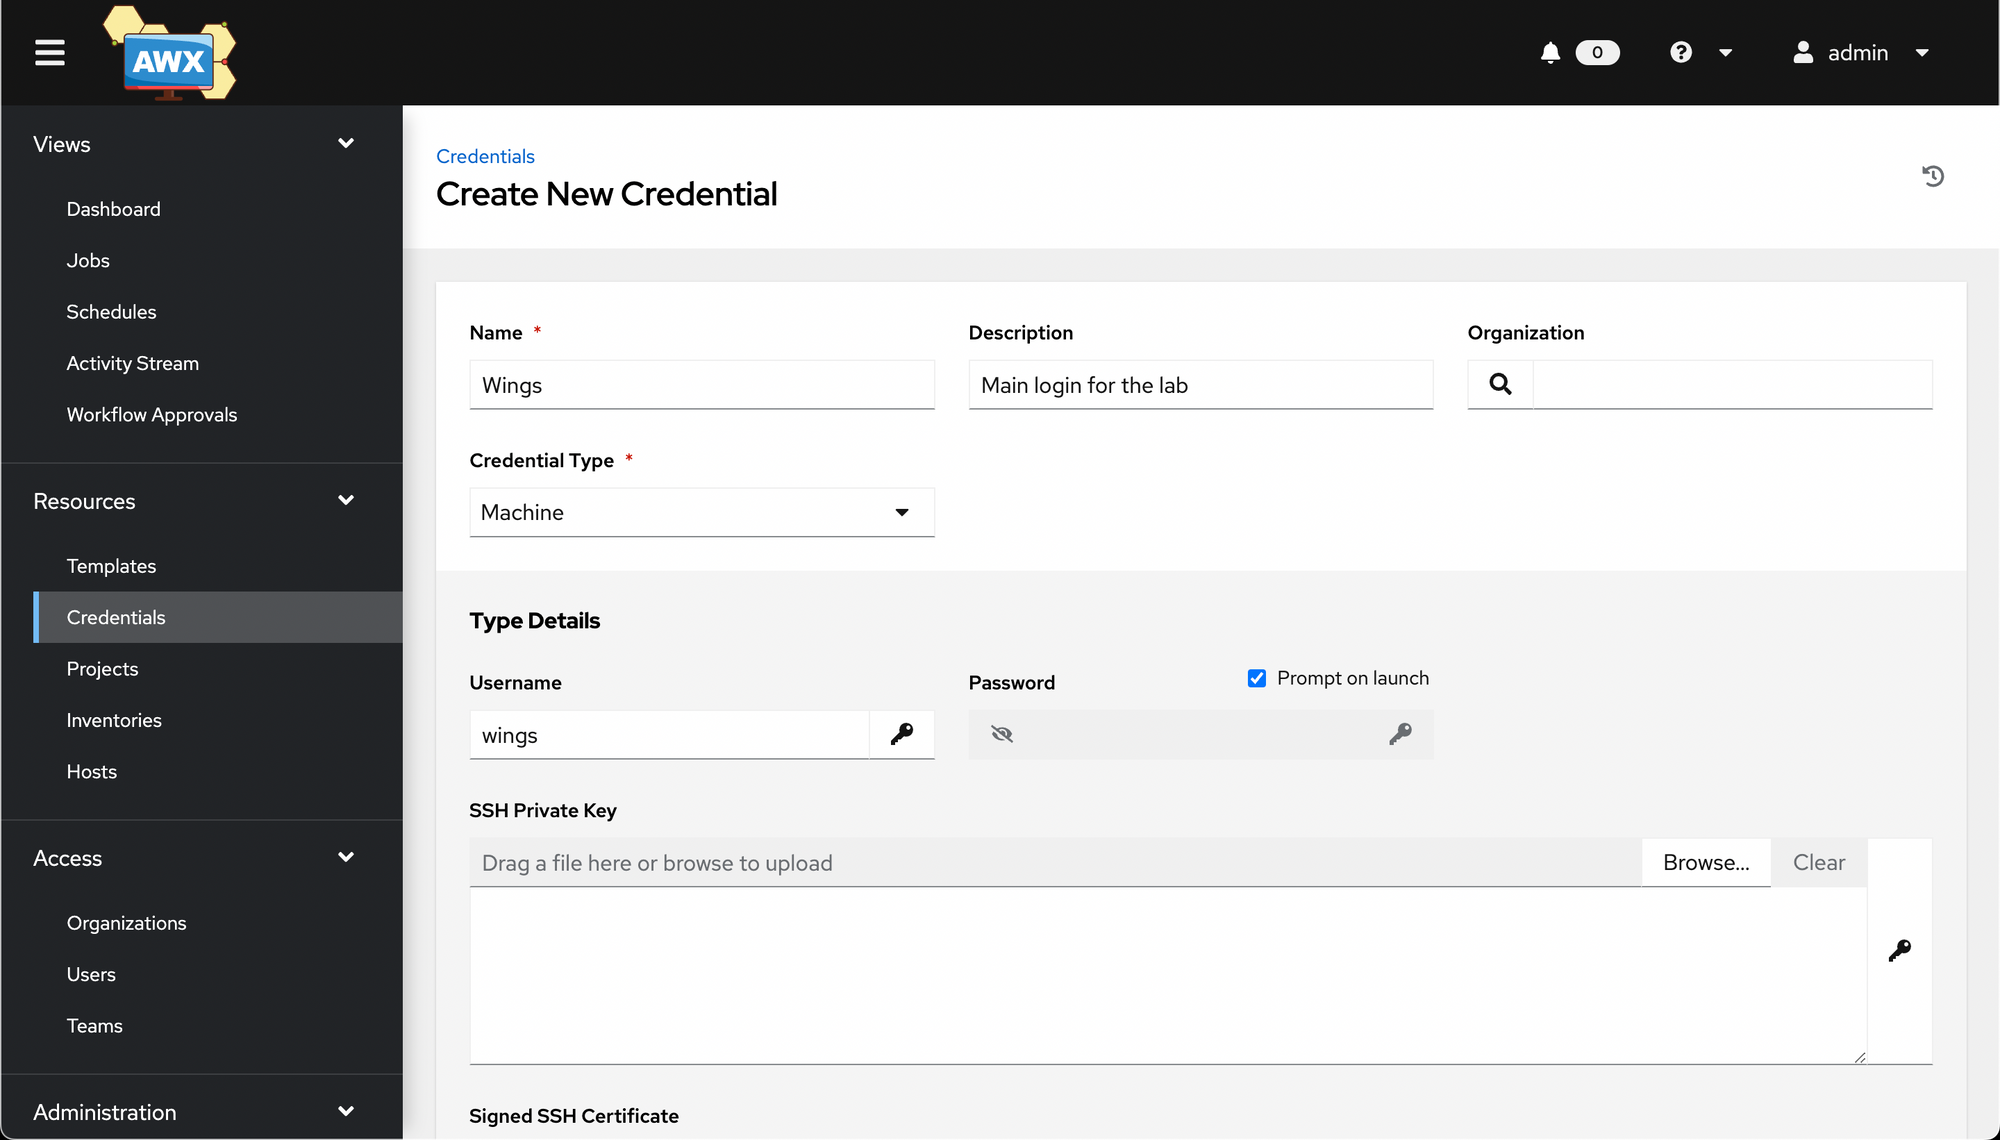
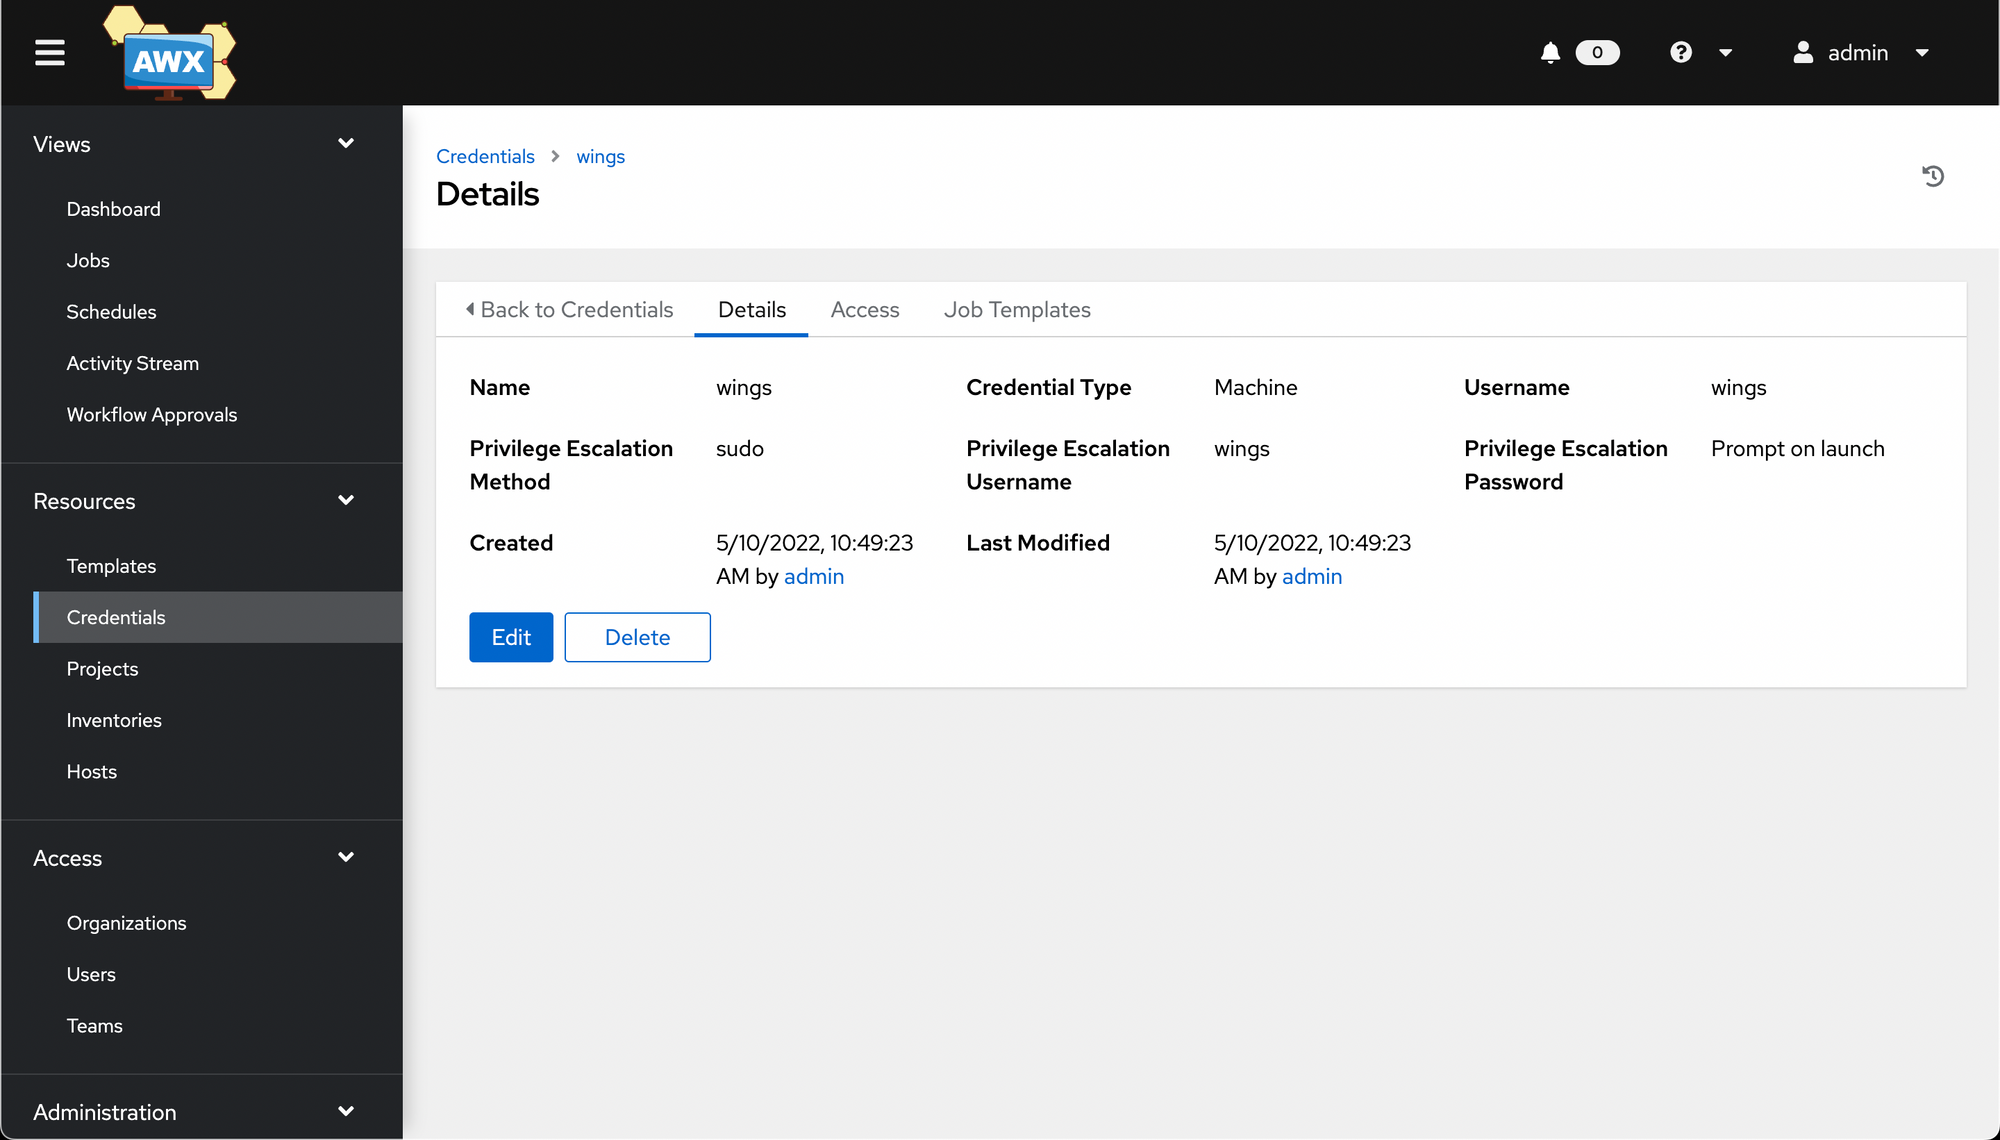
Once you hit Save, you're taken to a details page once again. (I selected a few extra options around privilege escalation before saving).
First project
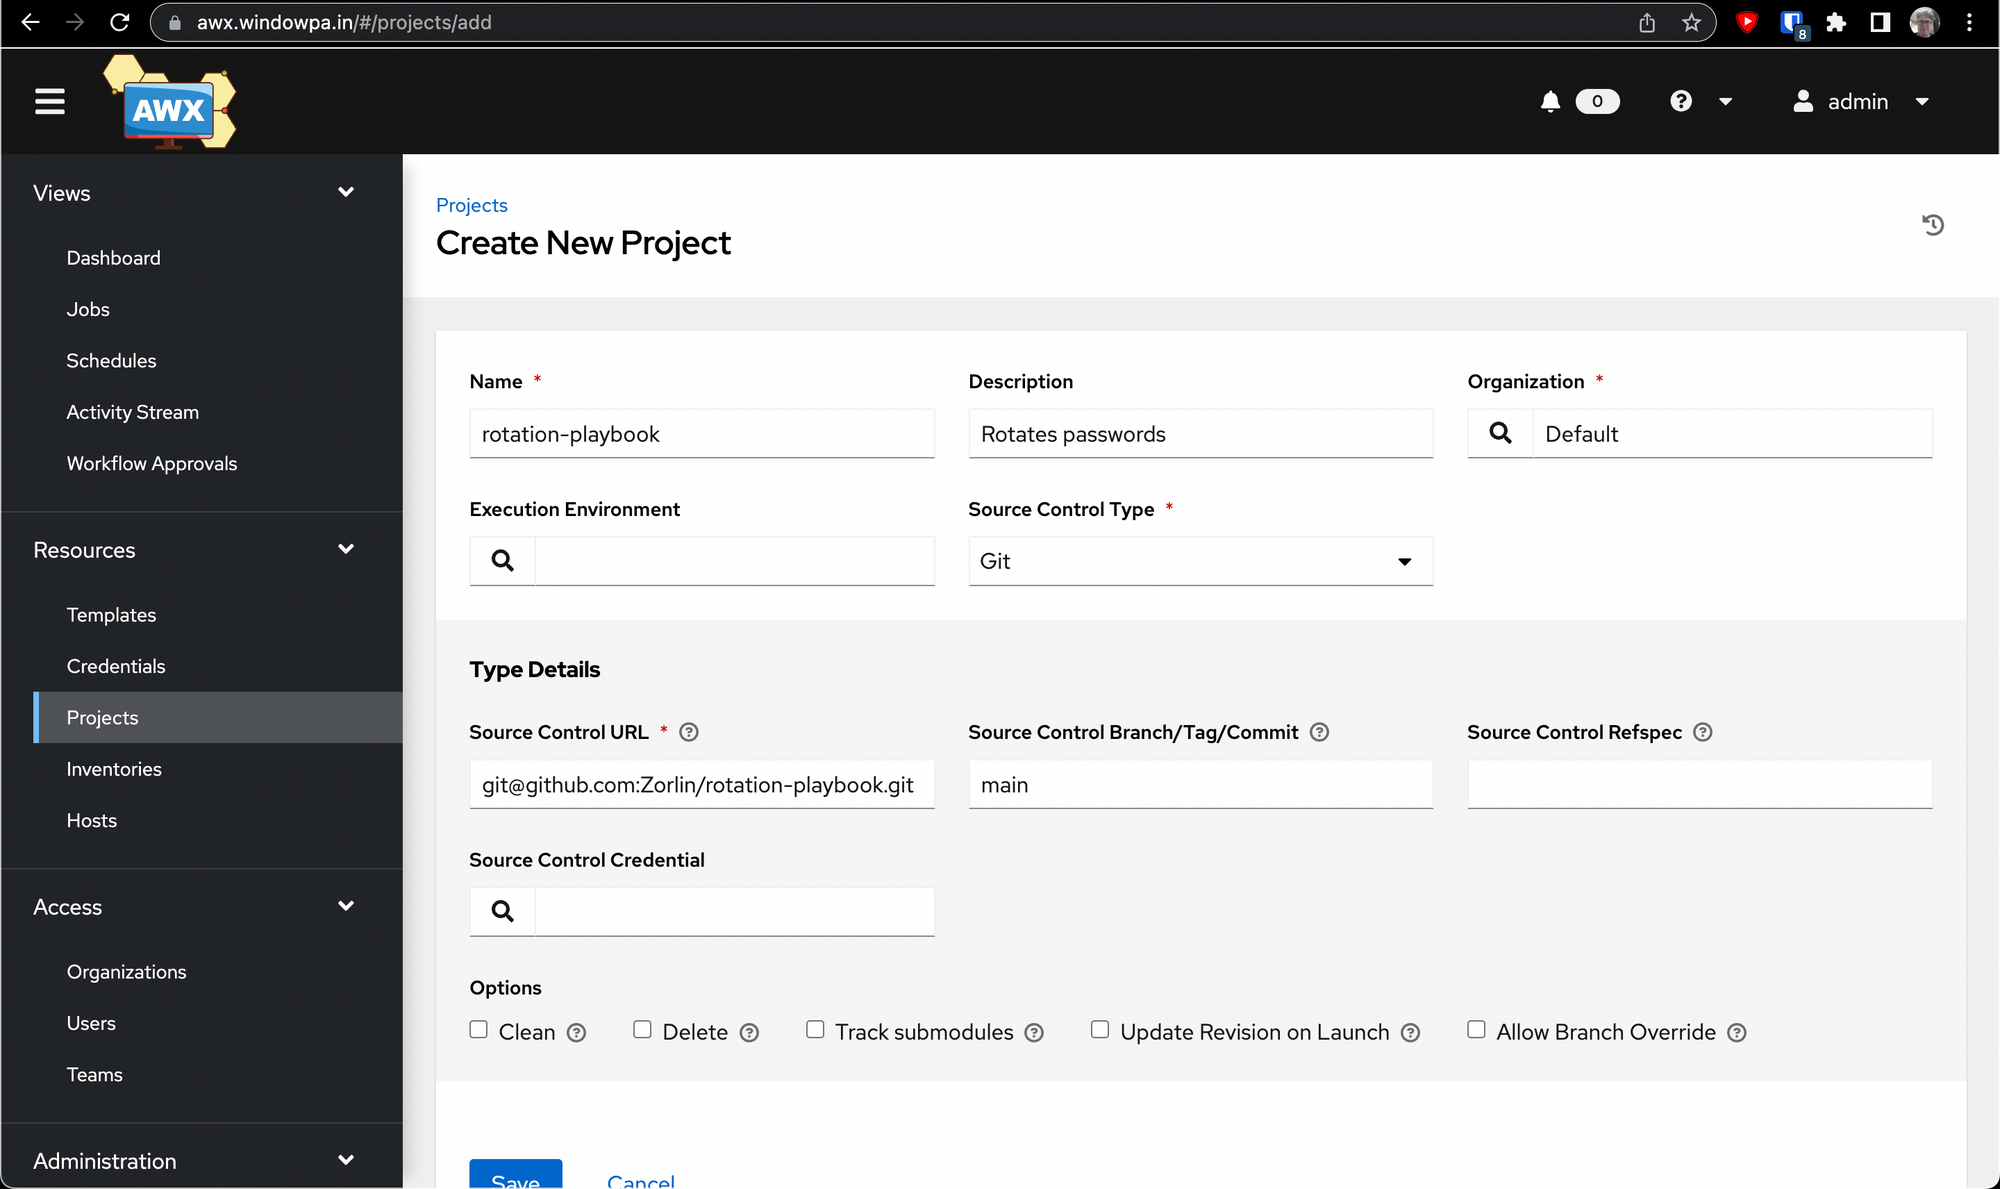
Next up, we'll create an AWX project. This is a bundle of code and playbooks to run, usually taken from source control, abstracted away a little bit.
Go to Resources -> Projects, then click Add.
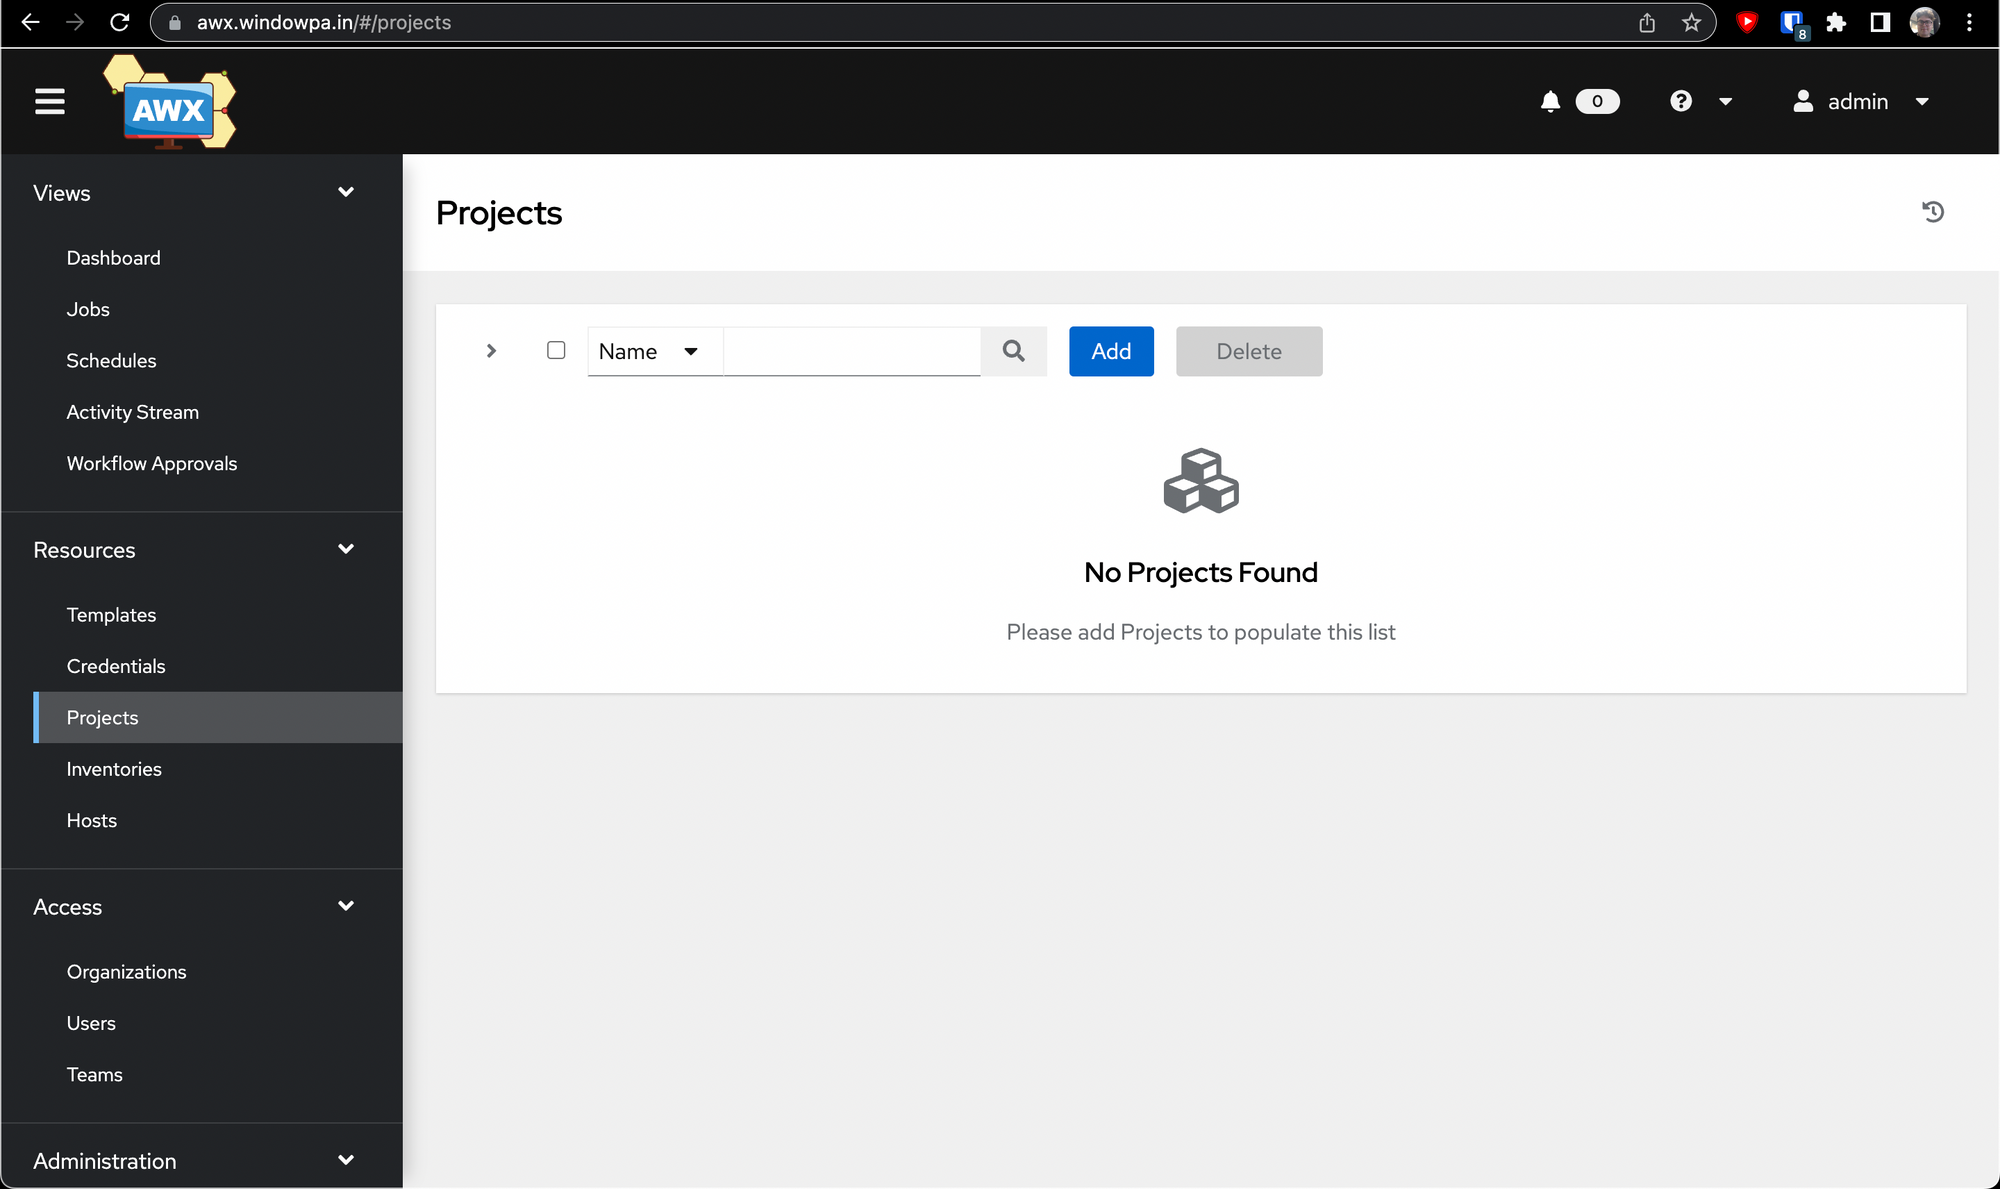
When you first go to create a project, it should look something like this:
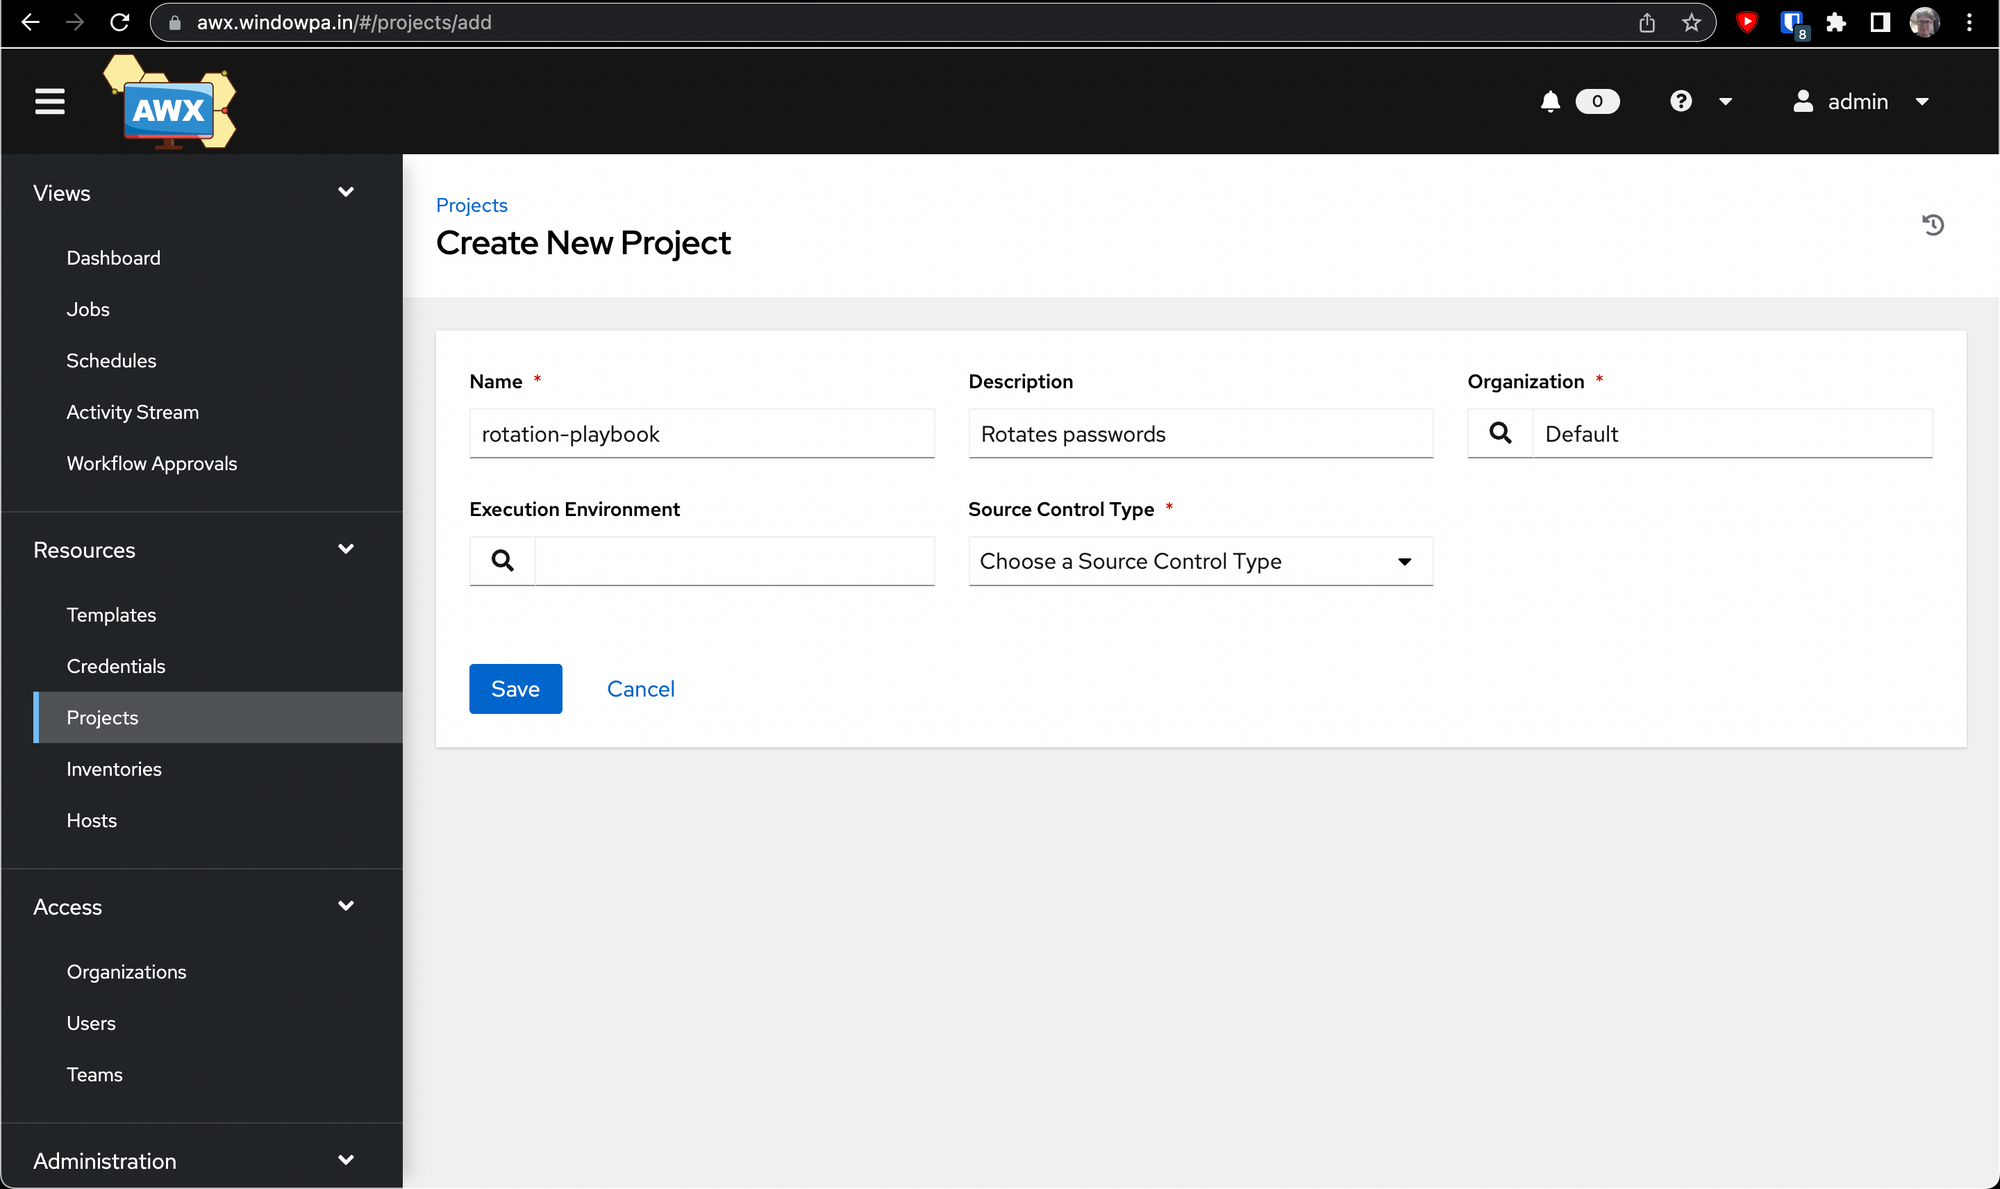
Once you select Git from the Source Control Type dropdown, a few more options open up.
Here's where we use the credential we created earlier. Click the little magnifying glass under Source Control Credential, and a wizard will pop up asking you to select a credential.
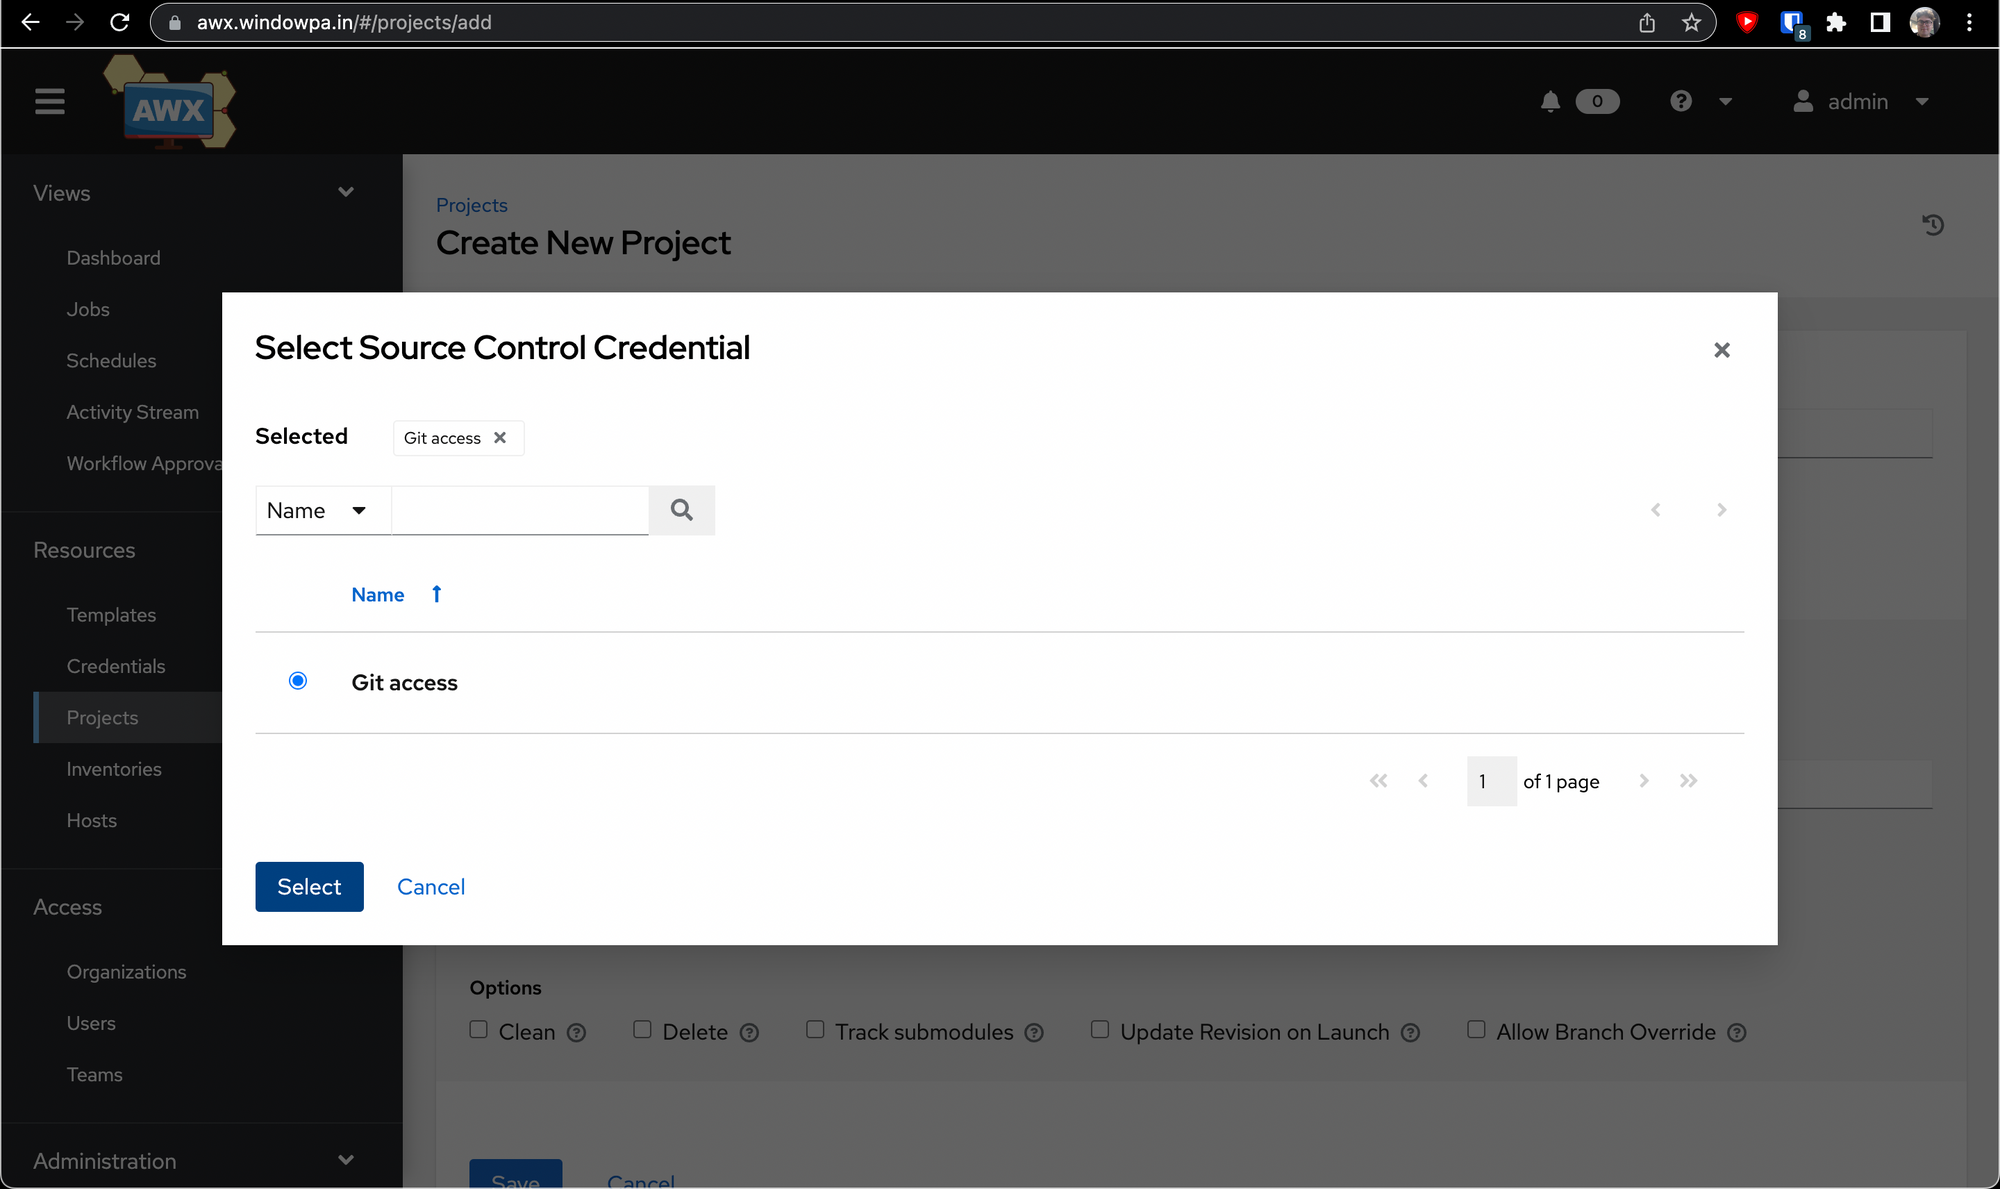
Once you hit Select, you're ready to go. You may want to select "Update Revision on Launch" before saving, but it's up to you. Now hit Save.
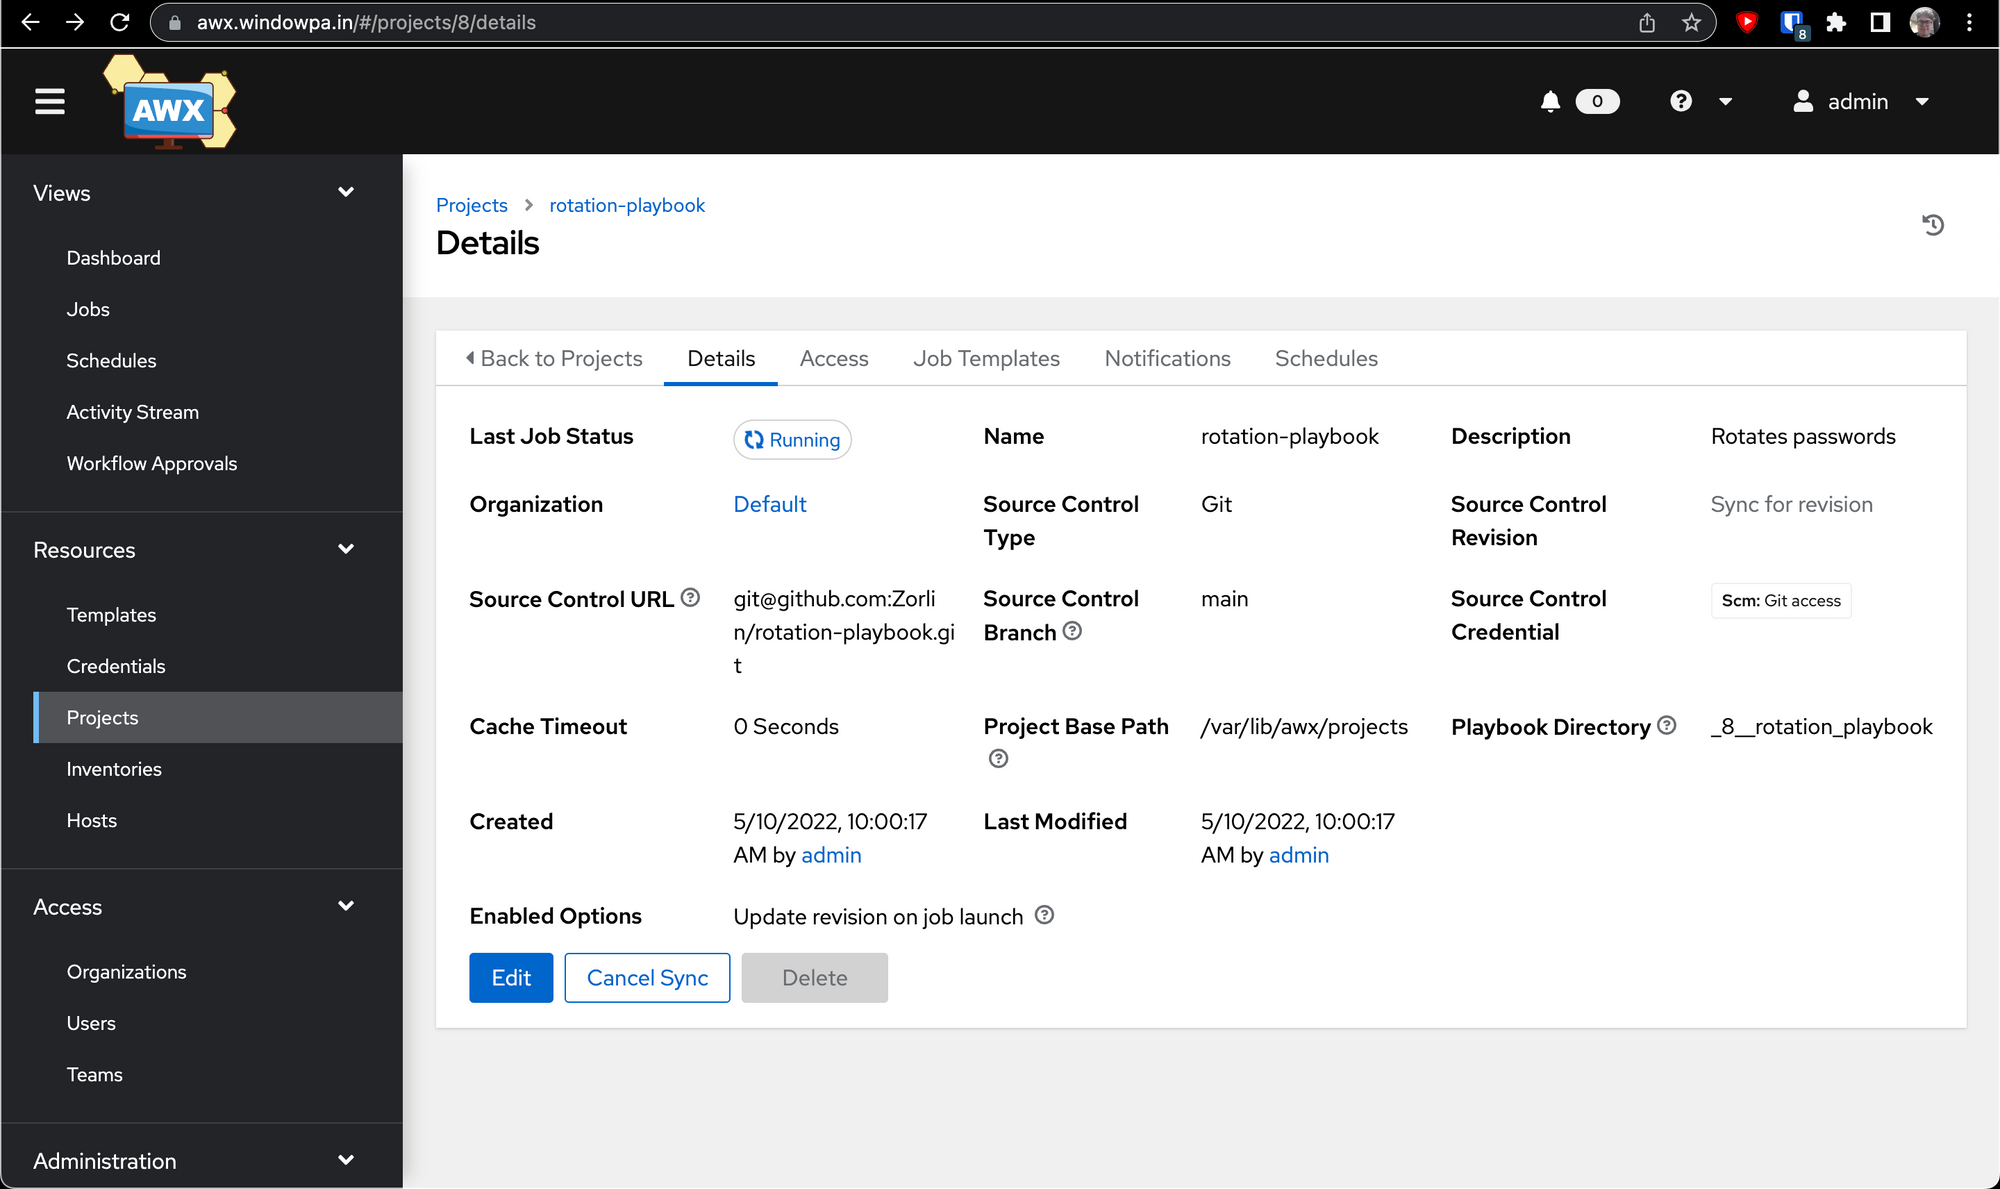
You'll be brought to a details screen for the project we just created, and depending on your selected options it should also be trying to sync for the first time. Hopefully after a few seconds you'll see something like this:
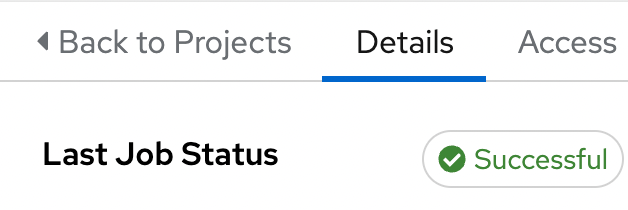
If all went well, you've got a project ready to go with all the code from the repository you chose - in my case, a playbook that can be used to rotate passwords using Ansible.
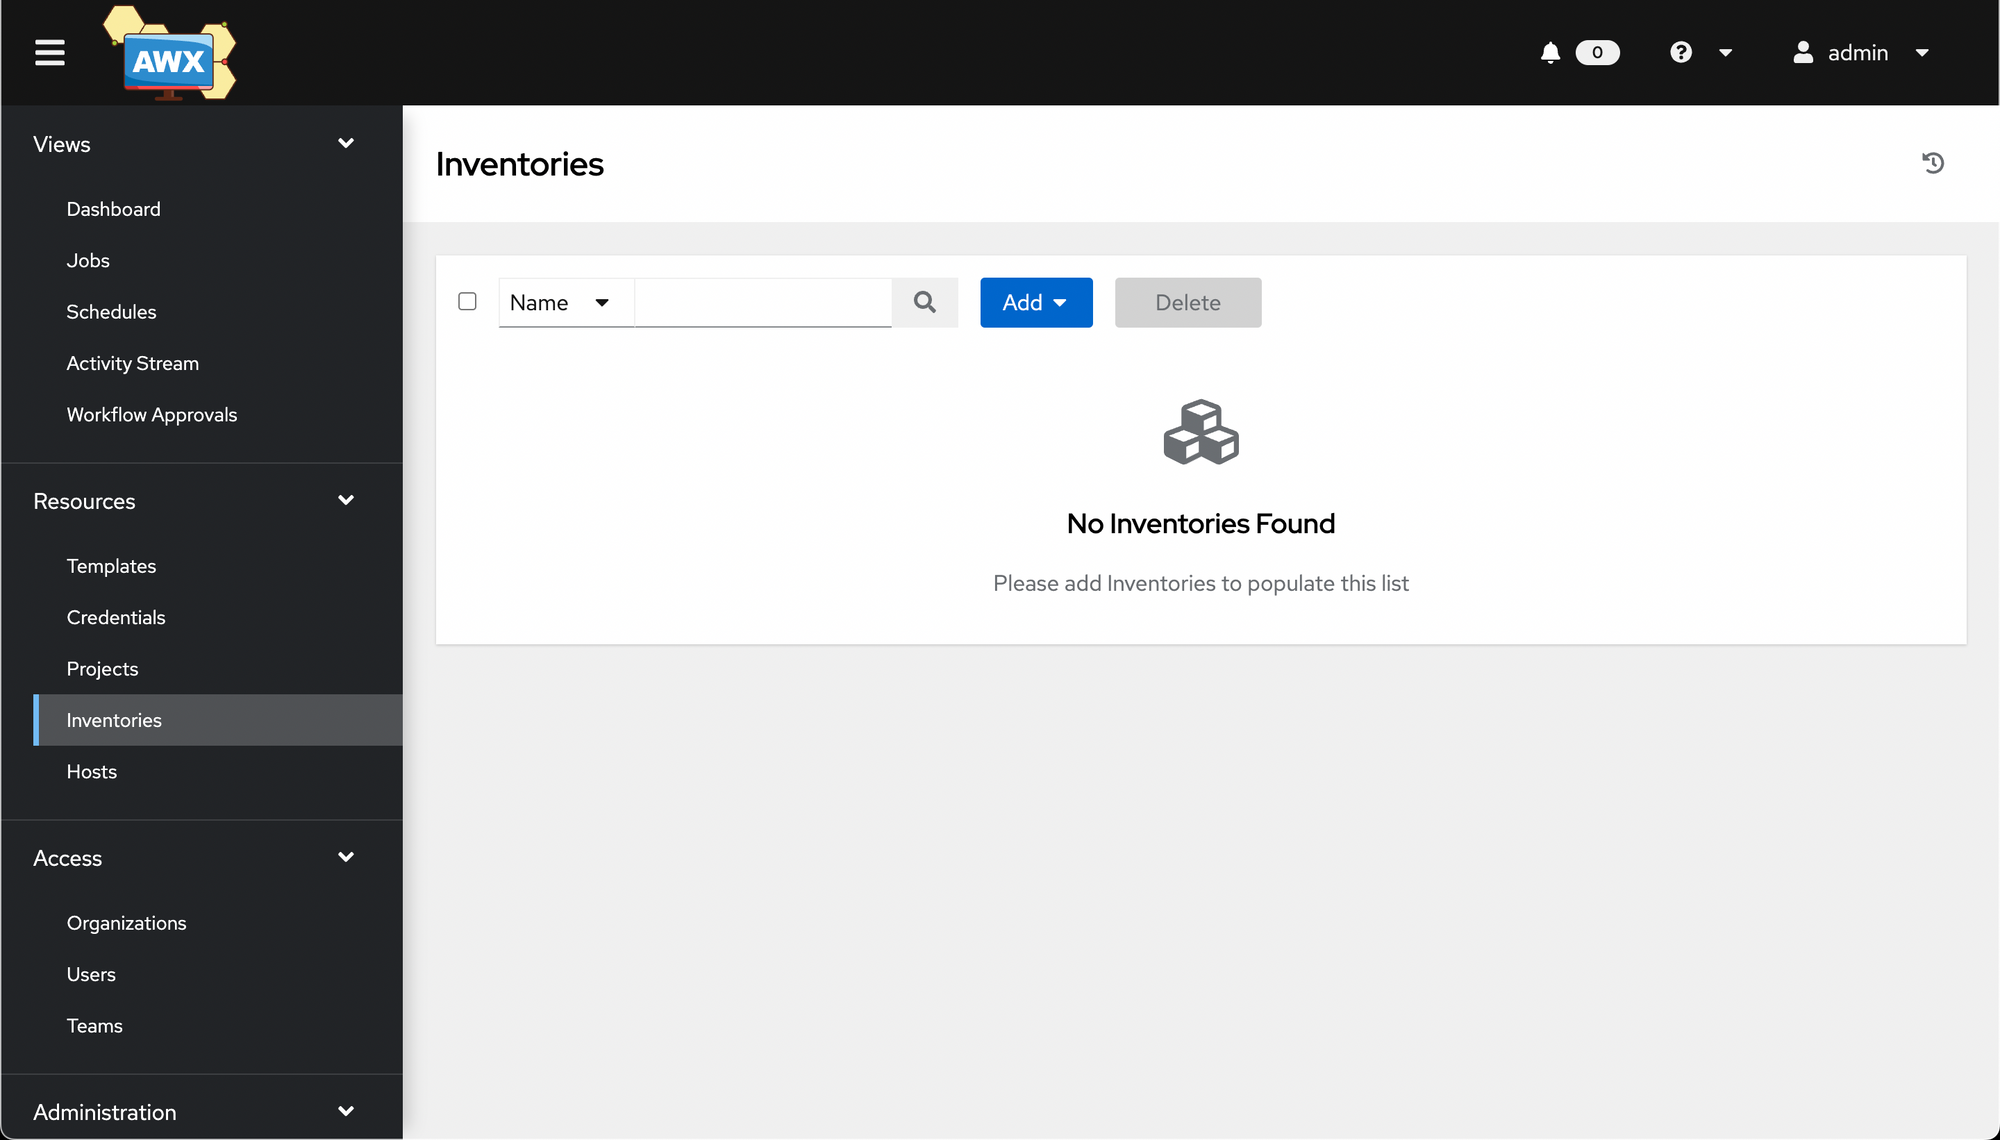
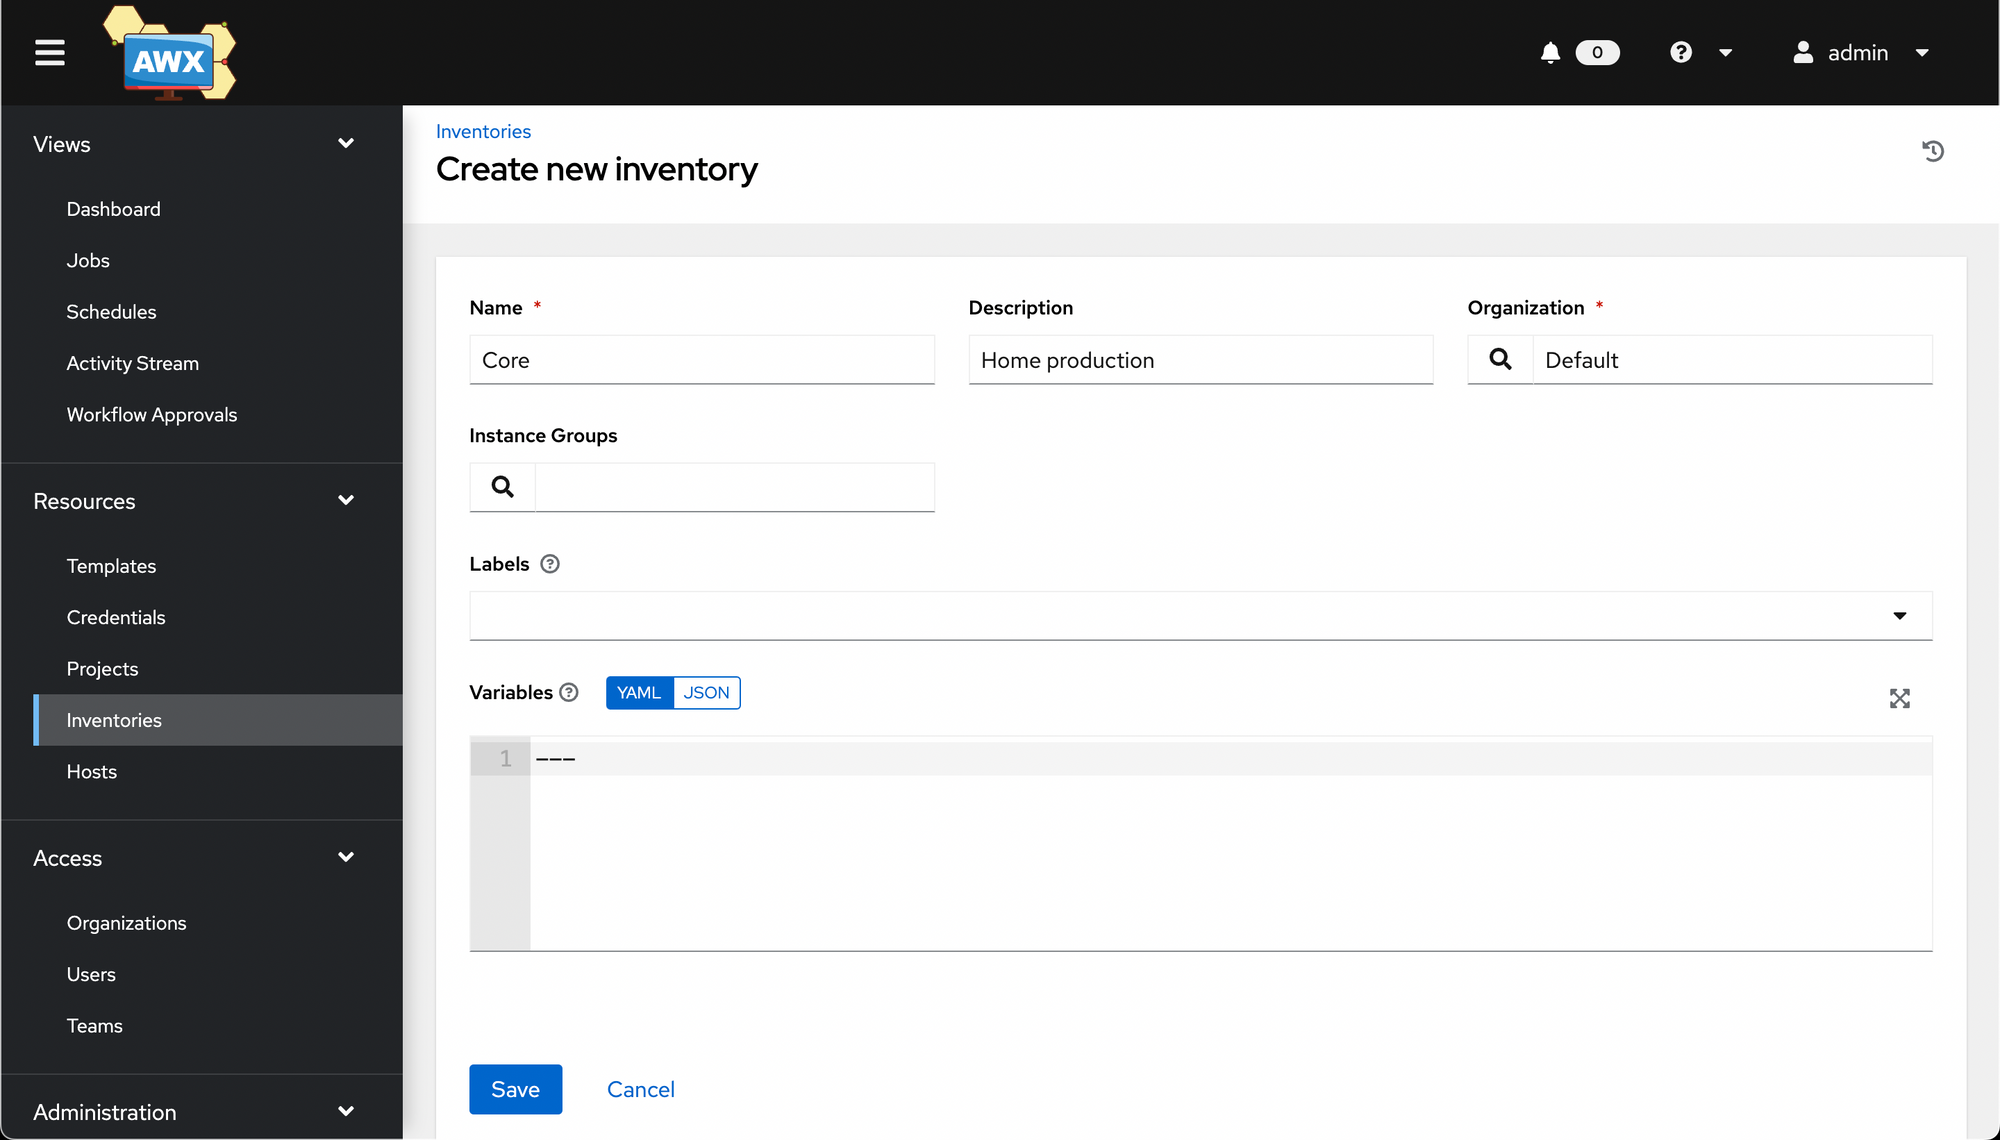
Inventory
Next we'll create an inventory, a list of machines we want to manage. Go to Resources -> Inventories, then Add -> Add Inventory.
Here's my first inventory. I called mine Core, but you can call yours whatever you want:
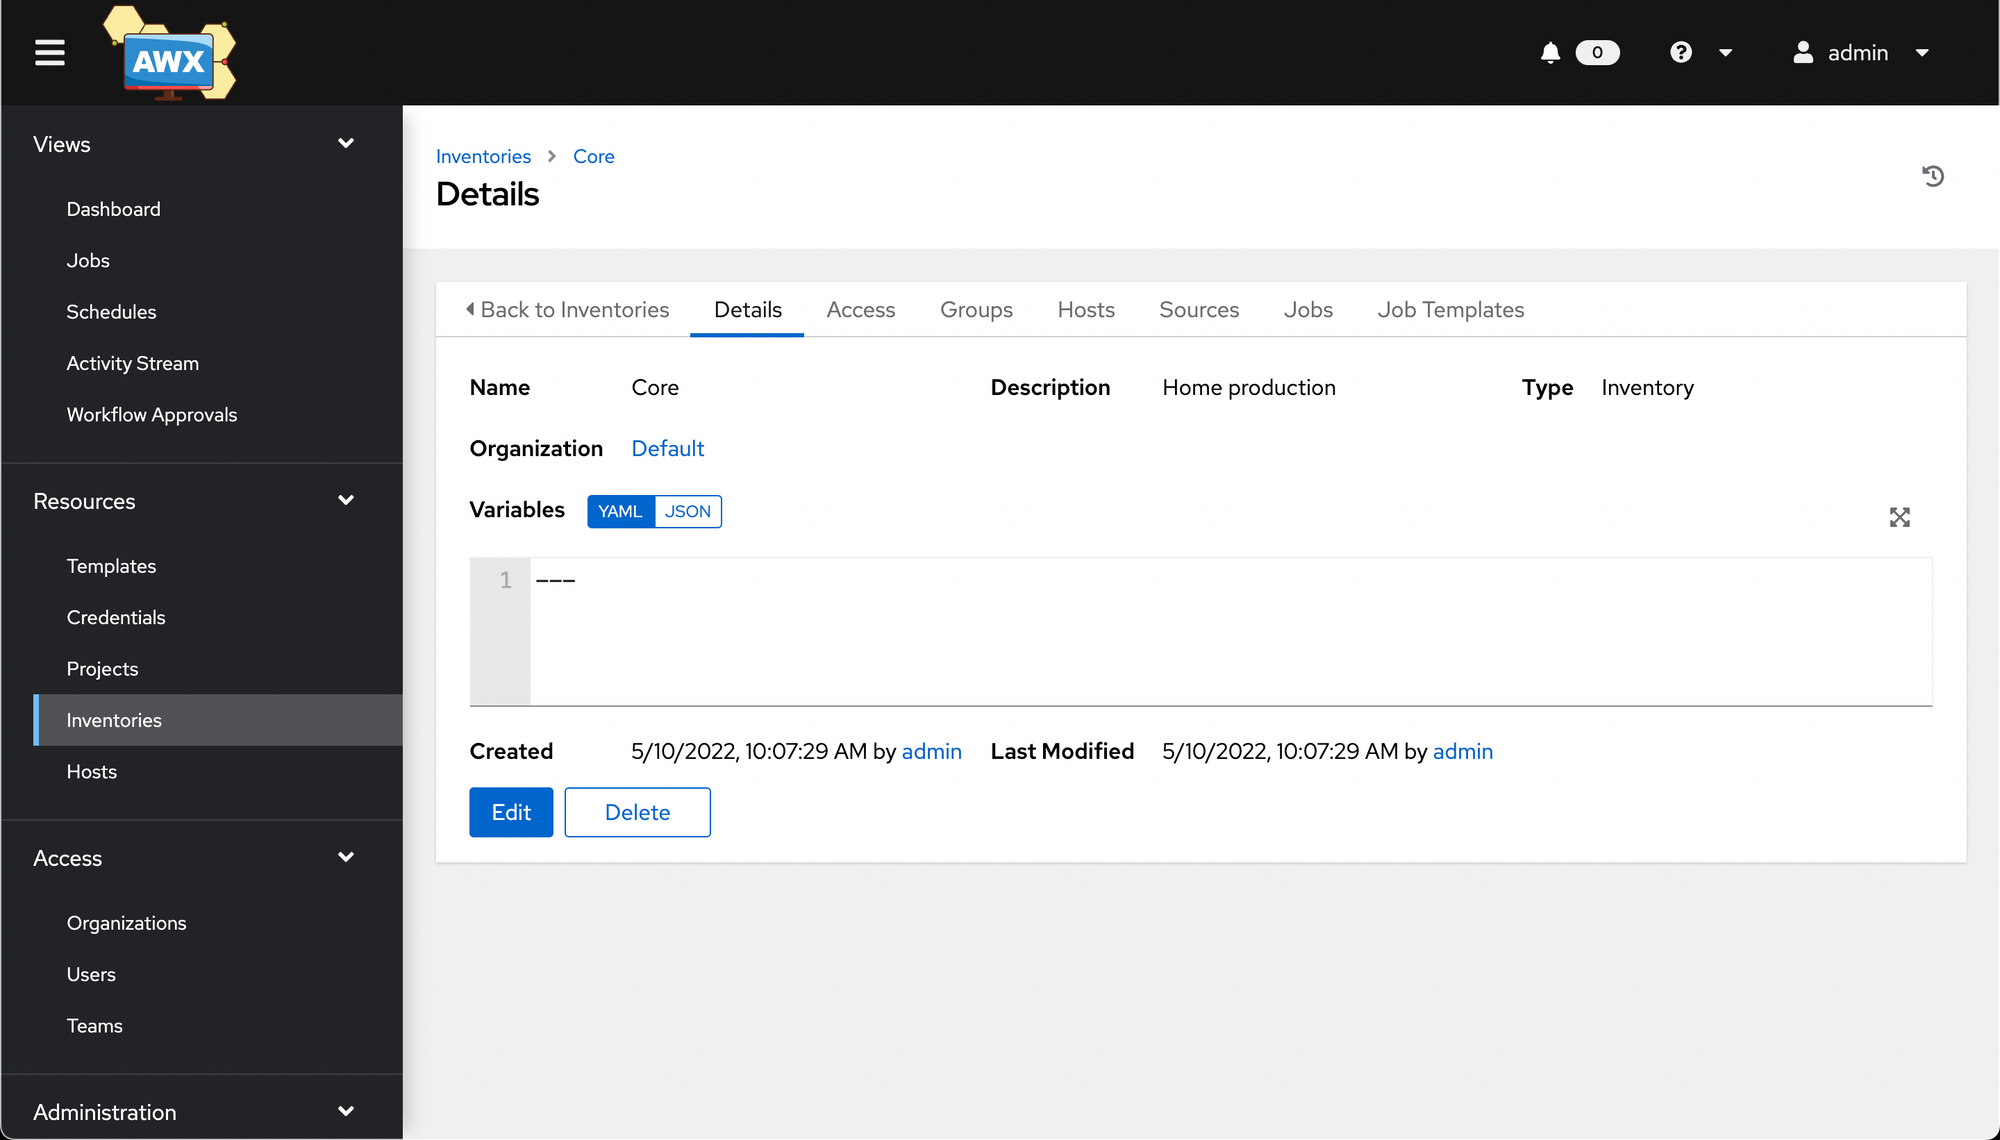
Once you hit save, you'll be taken to a details screen for that inventory, similar to what Projects did. Here you can define variables and see details about the inventory.
Now it's time to add some hosts. Click on the Hosts tab.
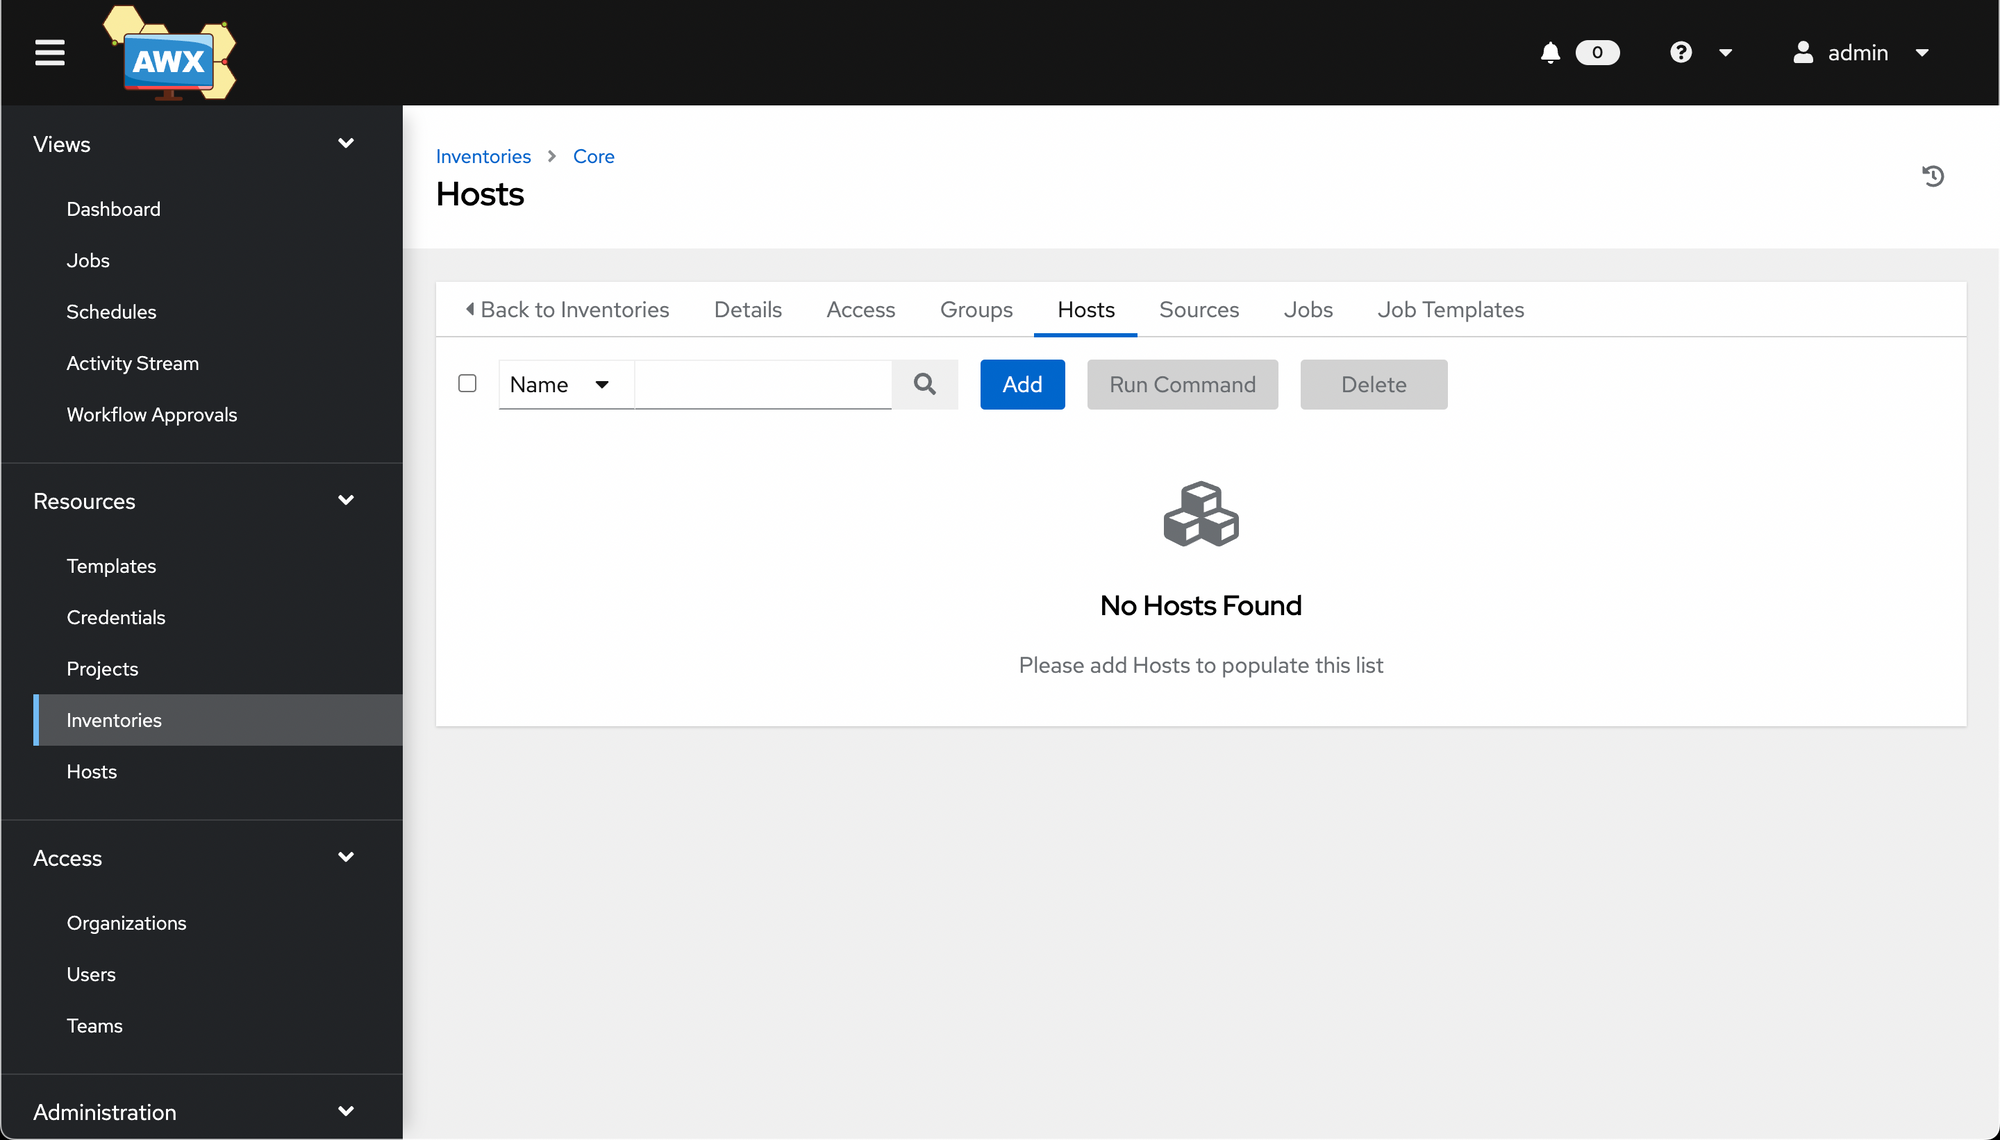
Now click Add, then fill out the long questionnaire. (Typically, only one question - the name - is required 🤣)
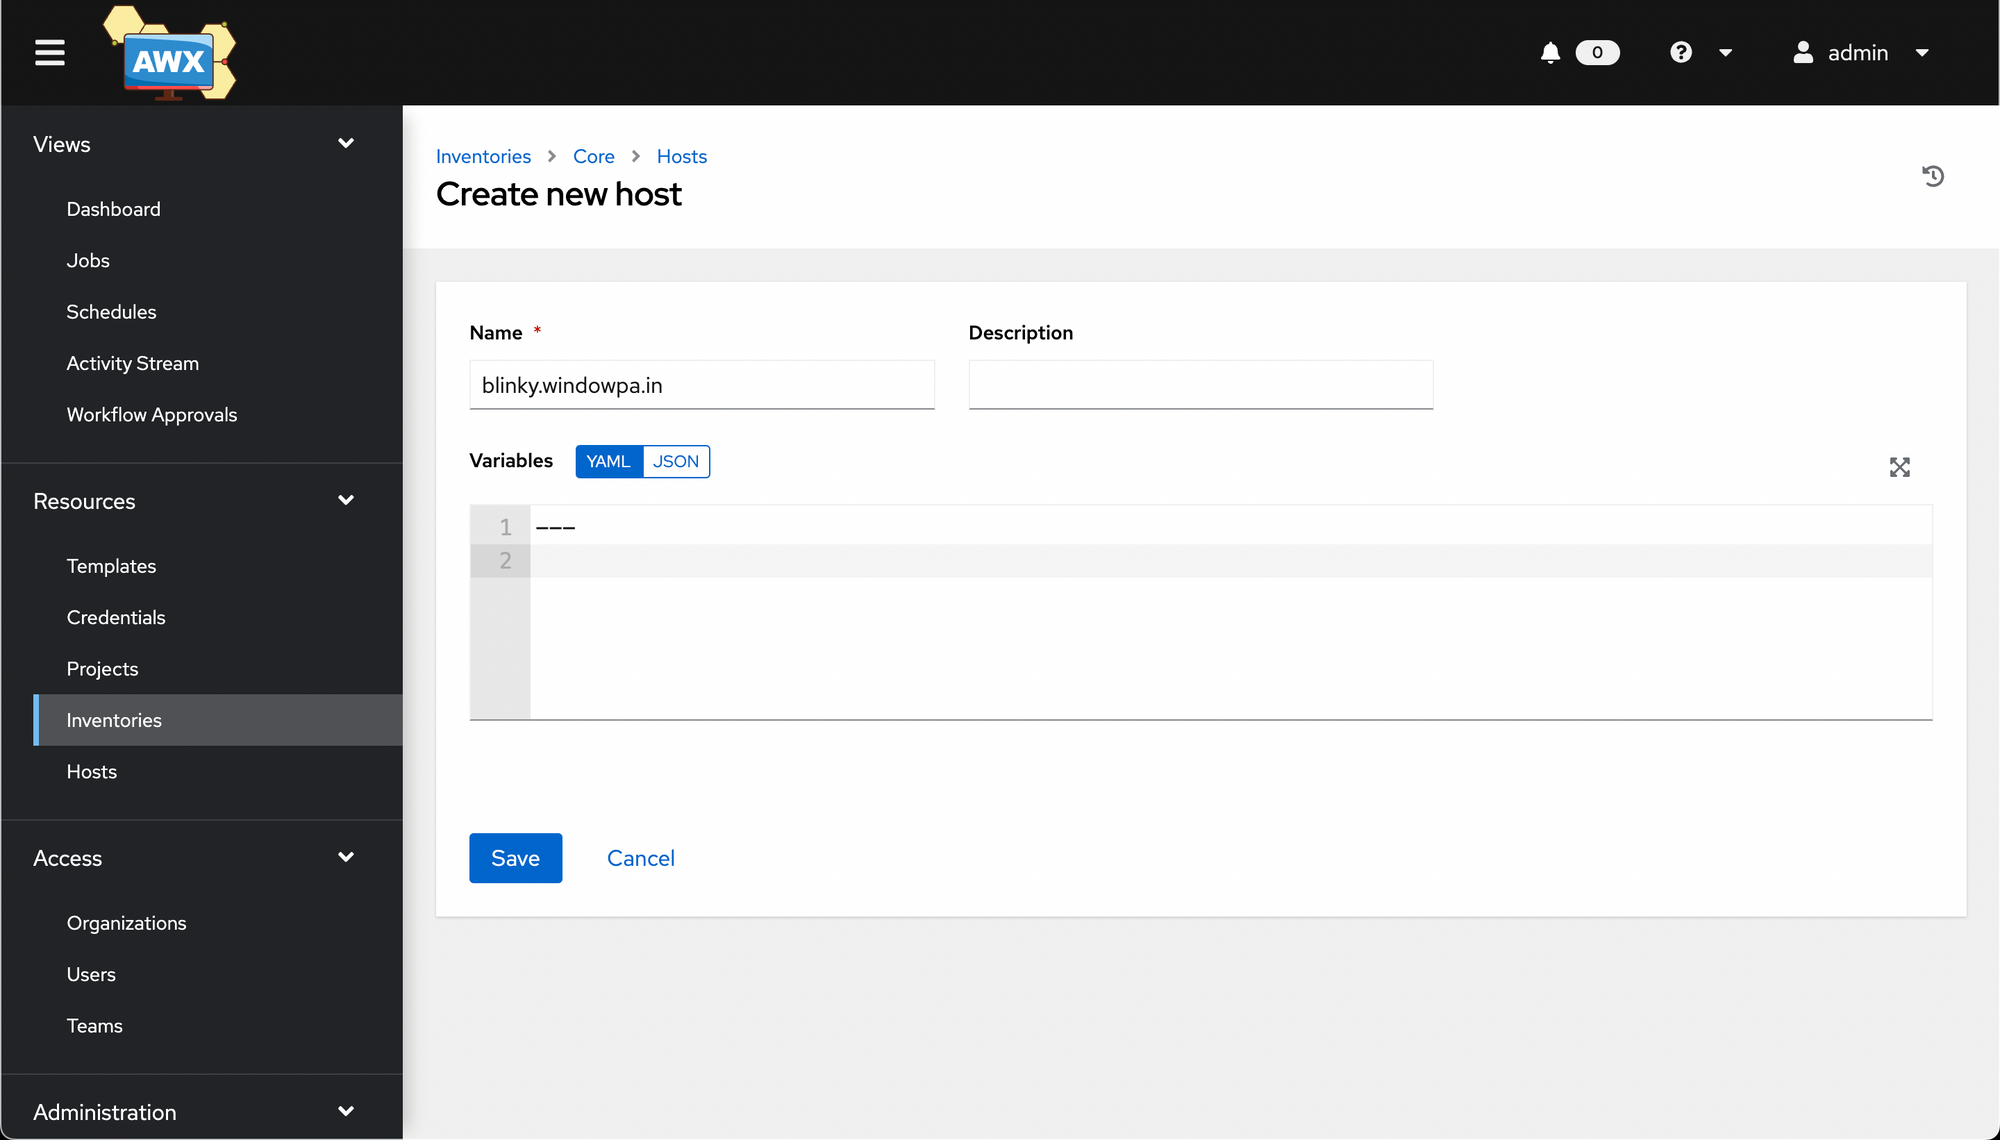
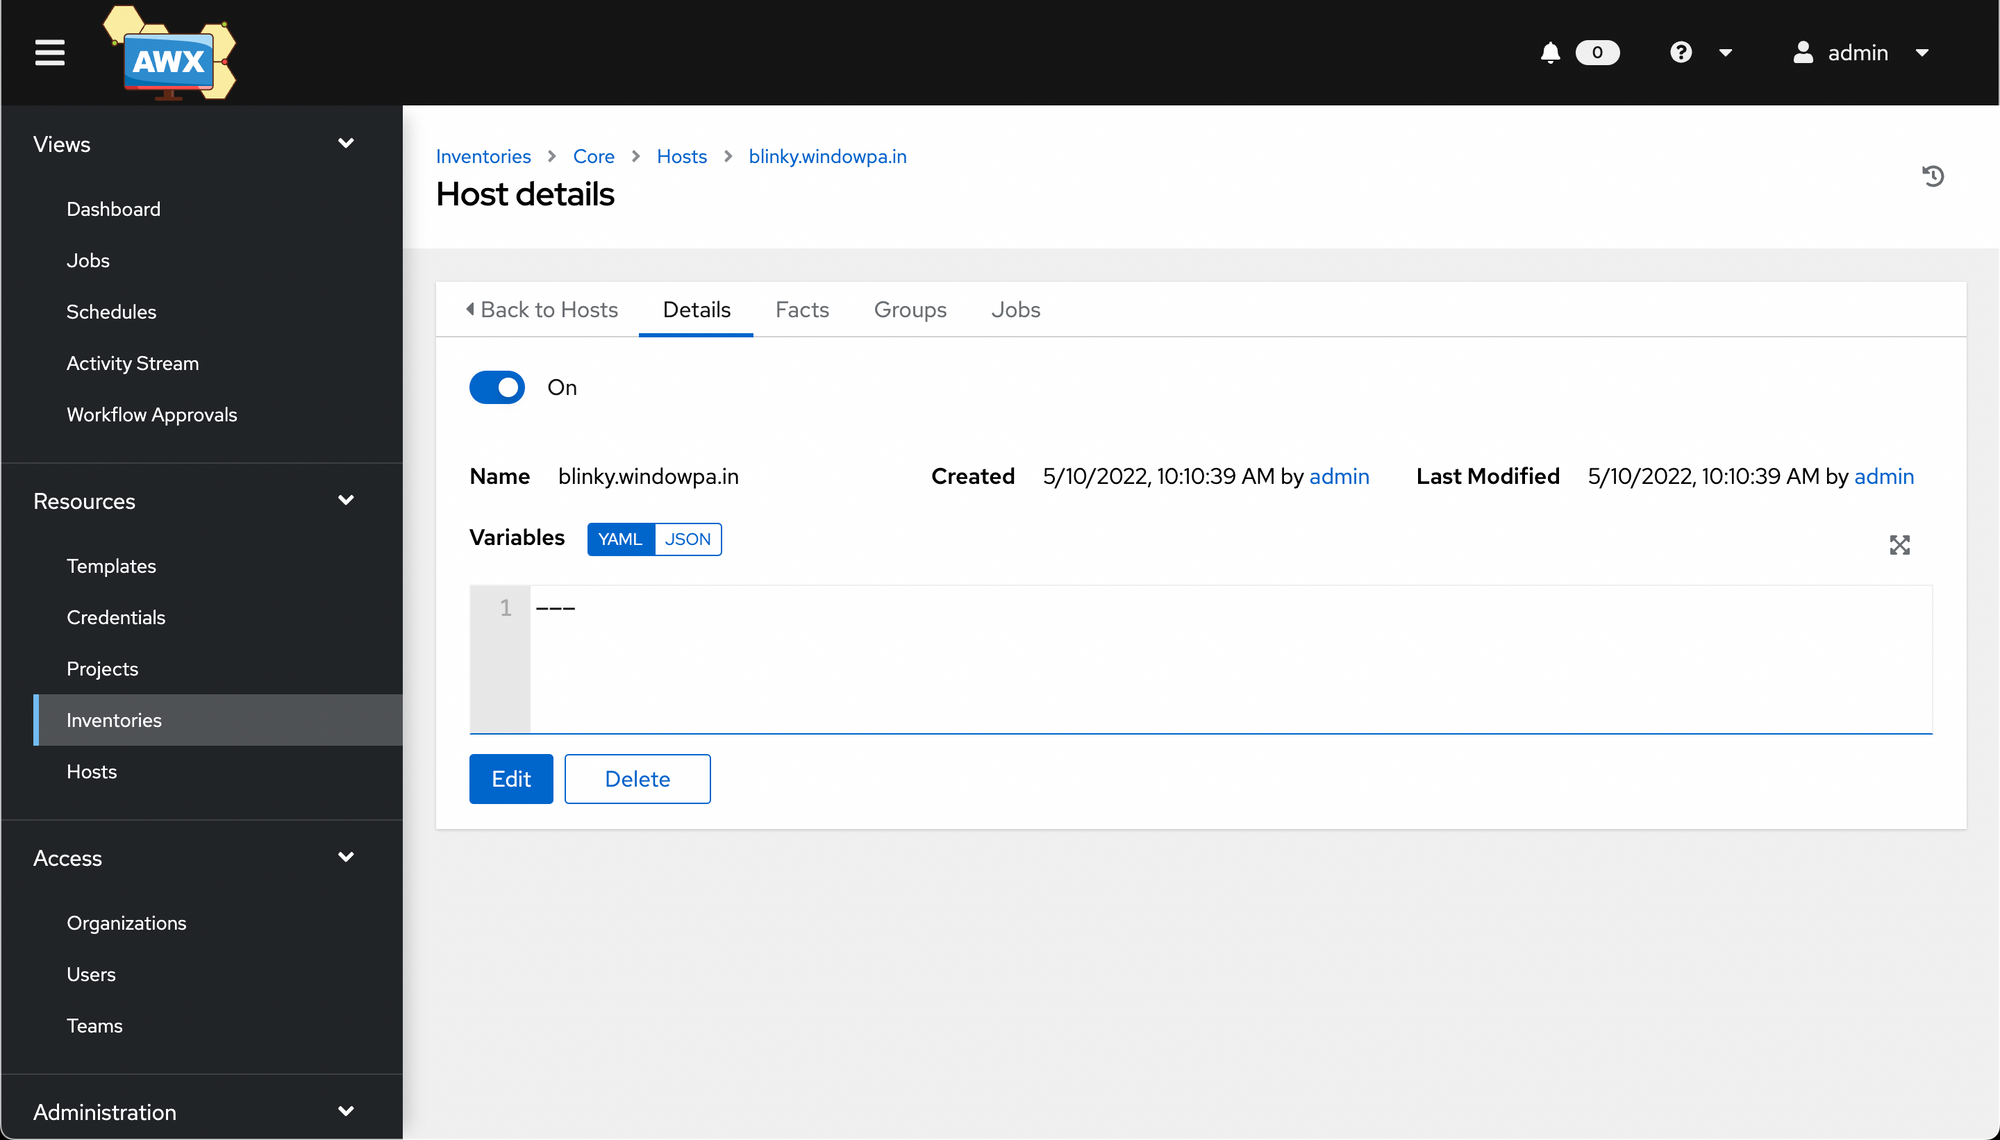
As with the inventory and project objects, you're then taken a Details page.
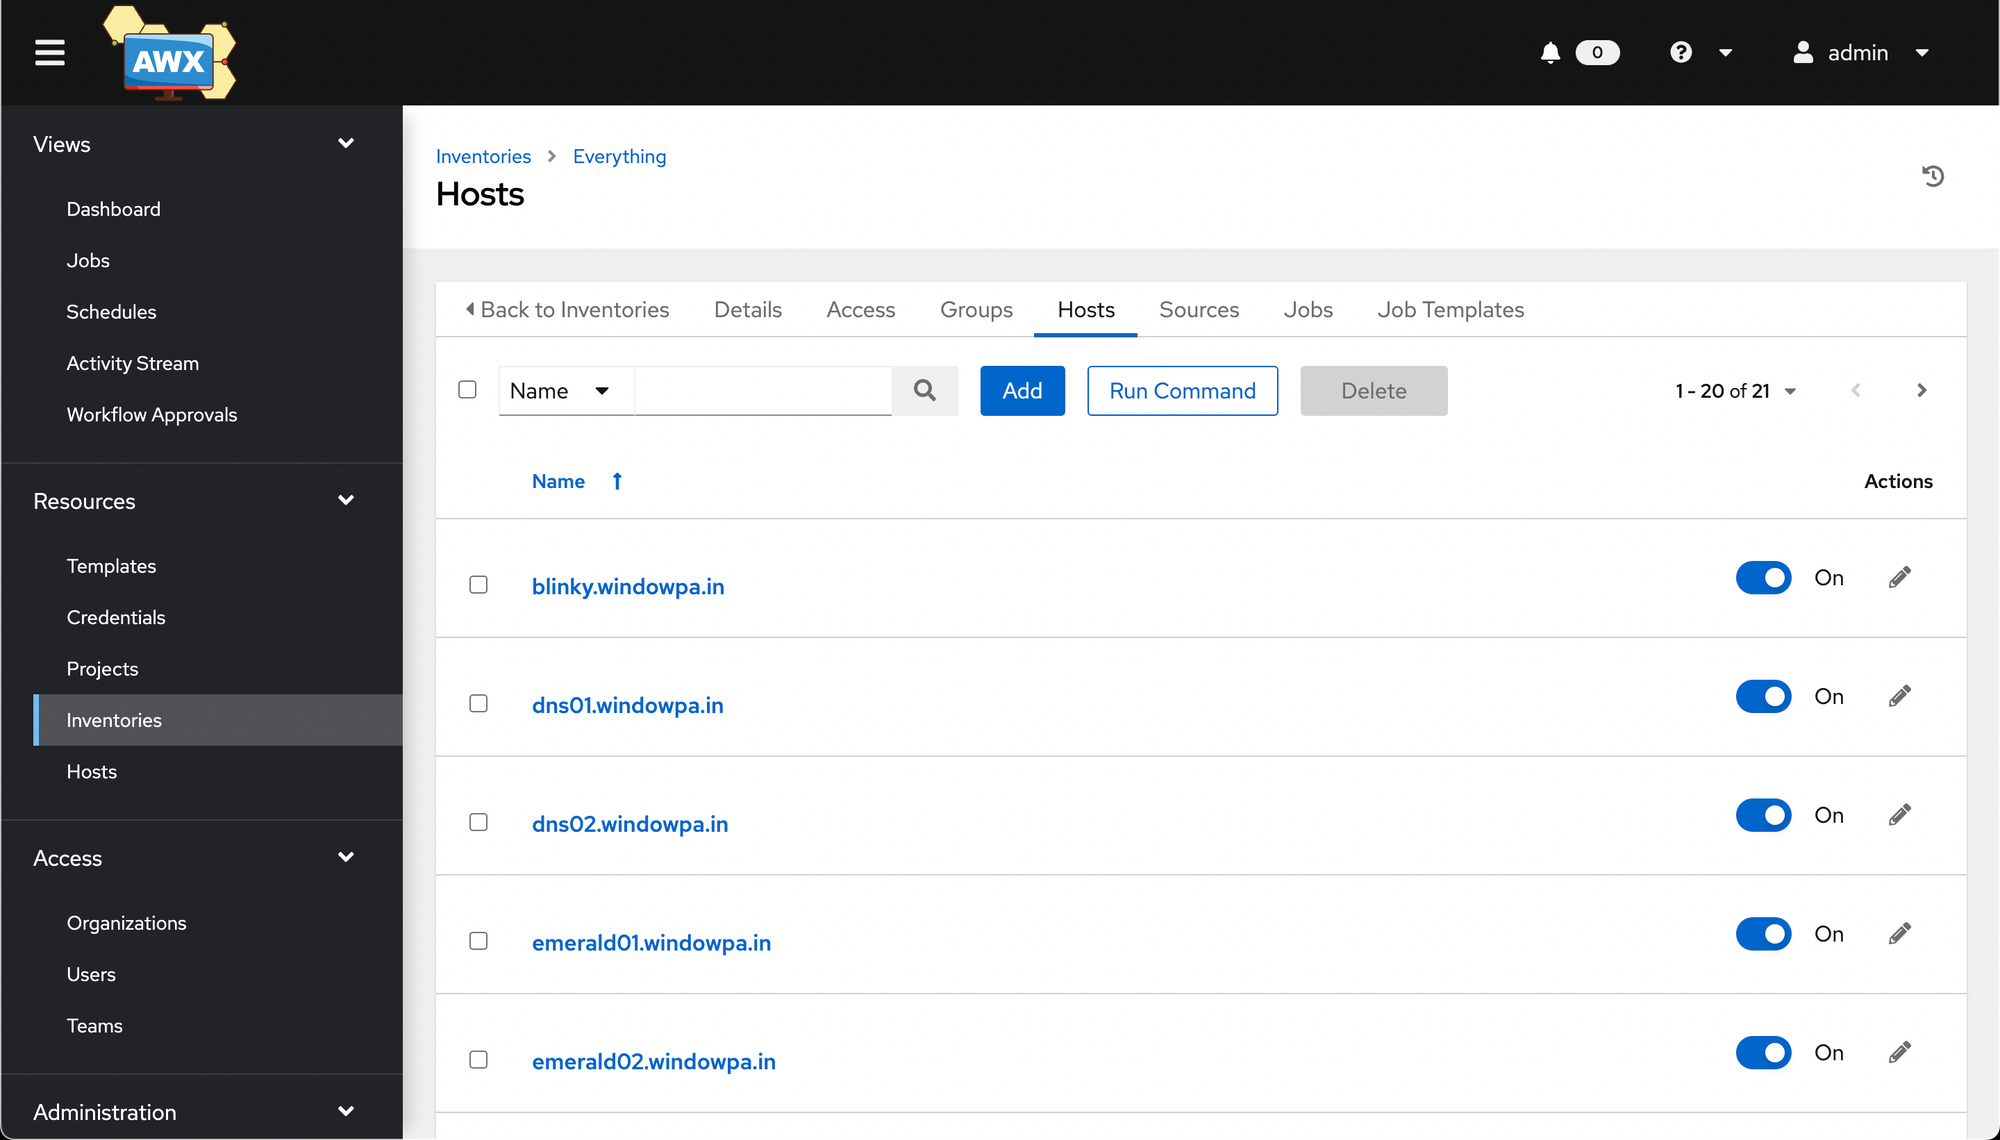
Feel free to create as many or as few hosts as you want. I later renamed this inventory to Everything and put everything in it. I'll create "core" properly later.
Template
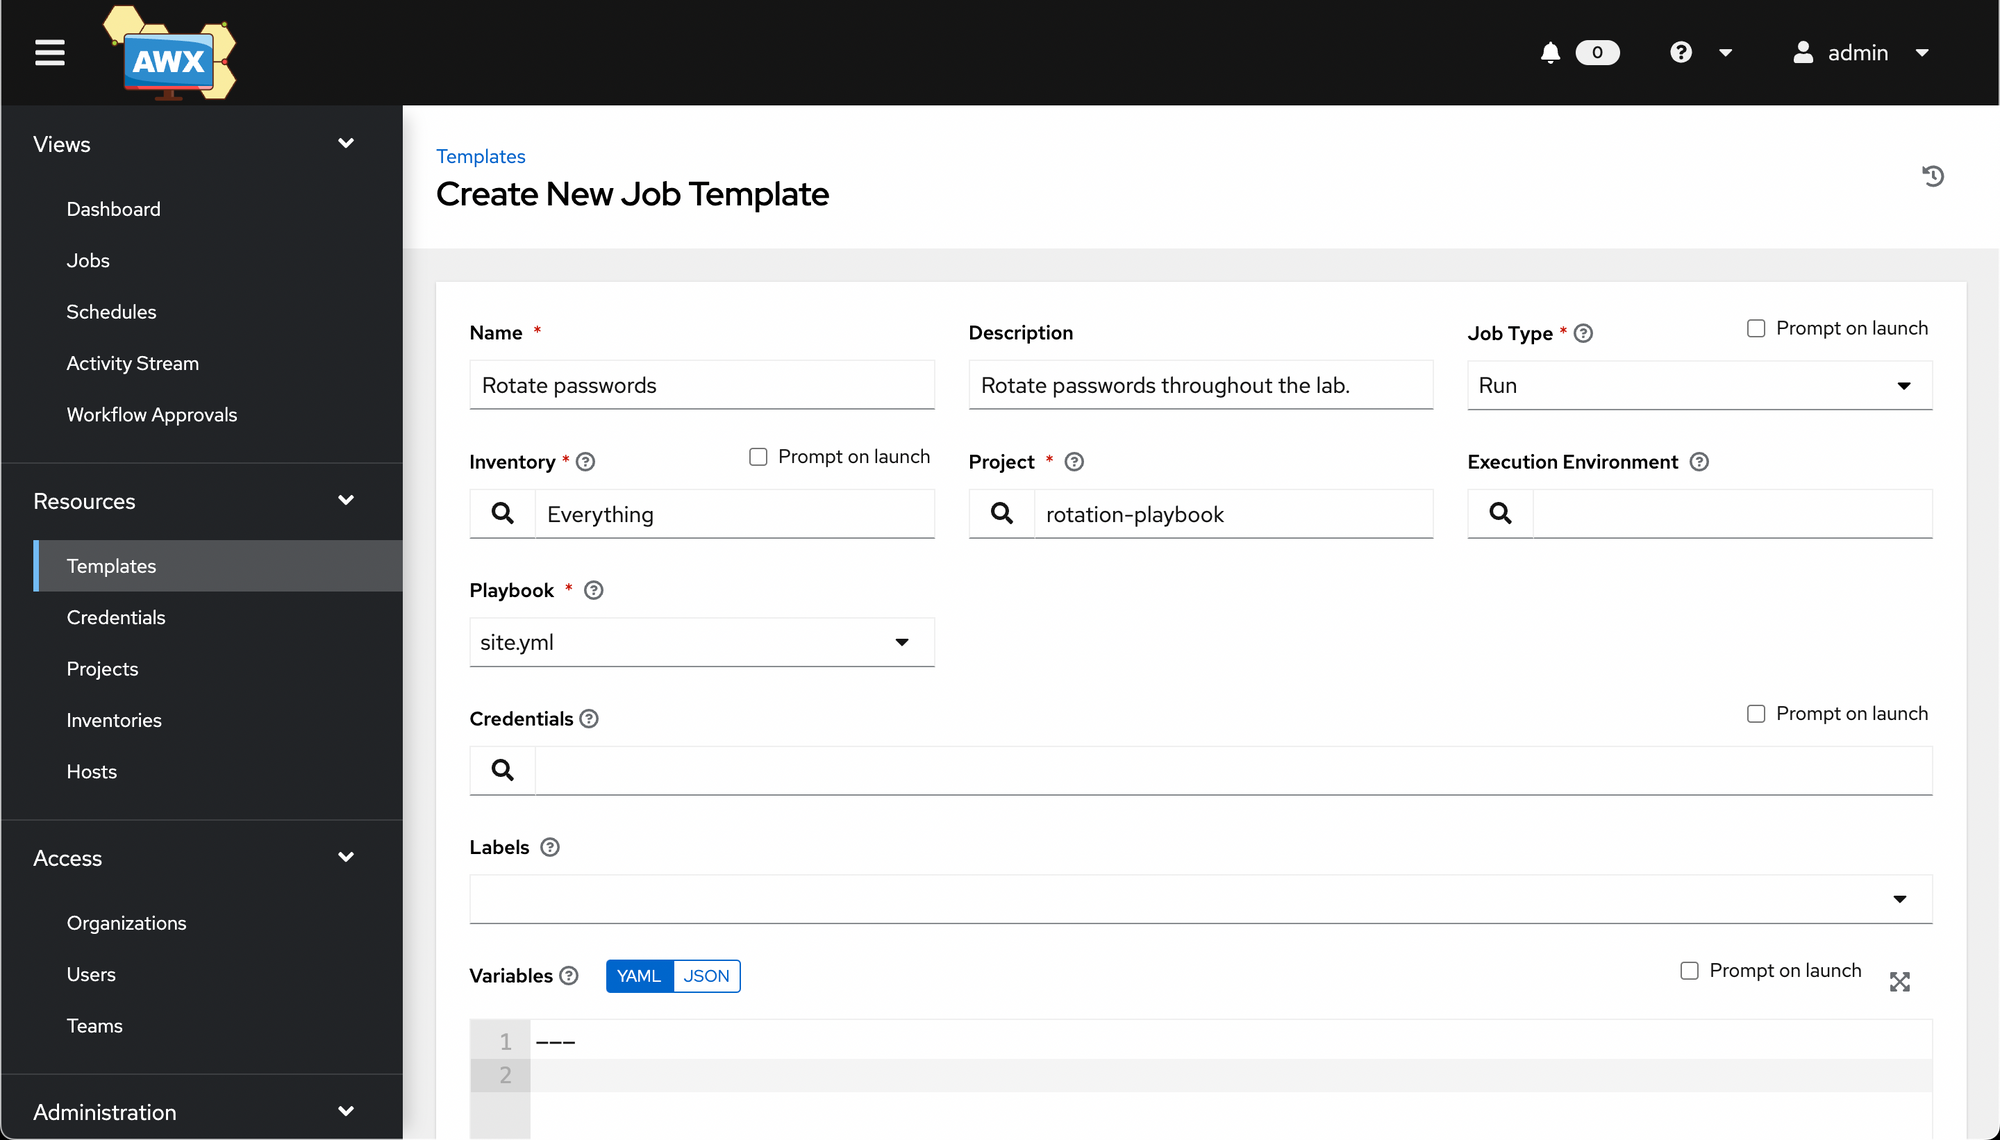
Now we'll create a Template with which to run our Project against our Inventory.
Go to Resources -> Templates. Click Add -> Add job template.

Then fill out the wizard. Not pictured: you may want to select a Credential under Credentials (specifically, the Machine credential created earlier).
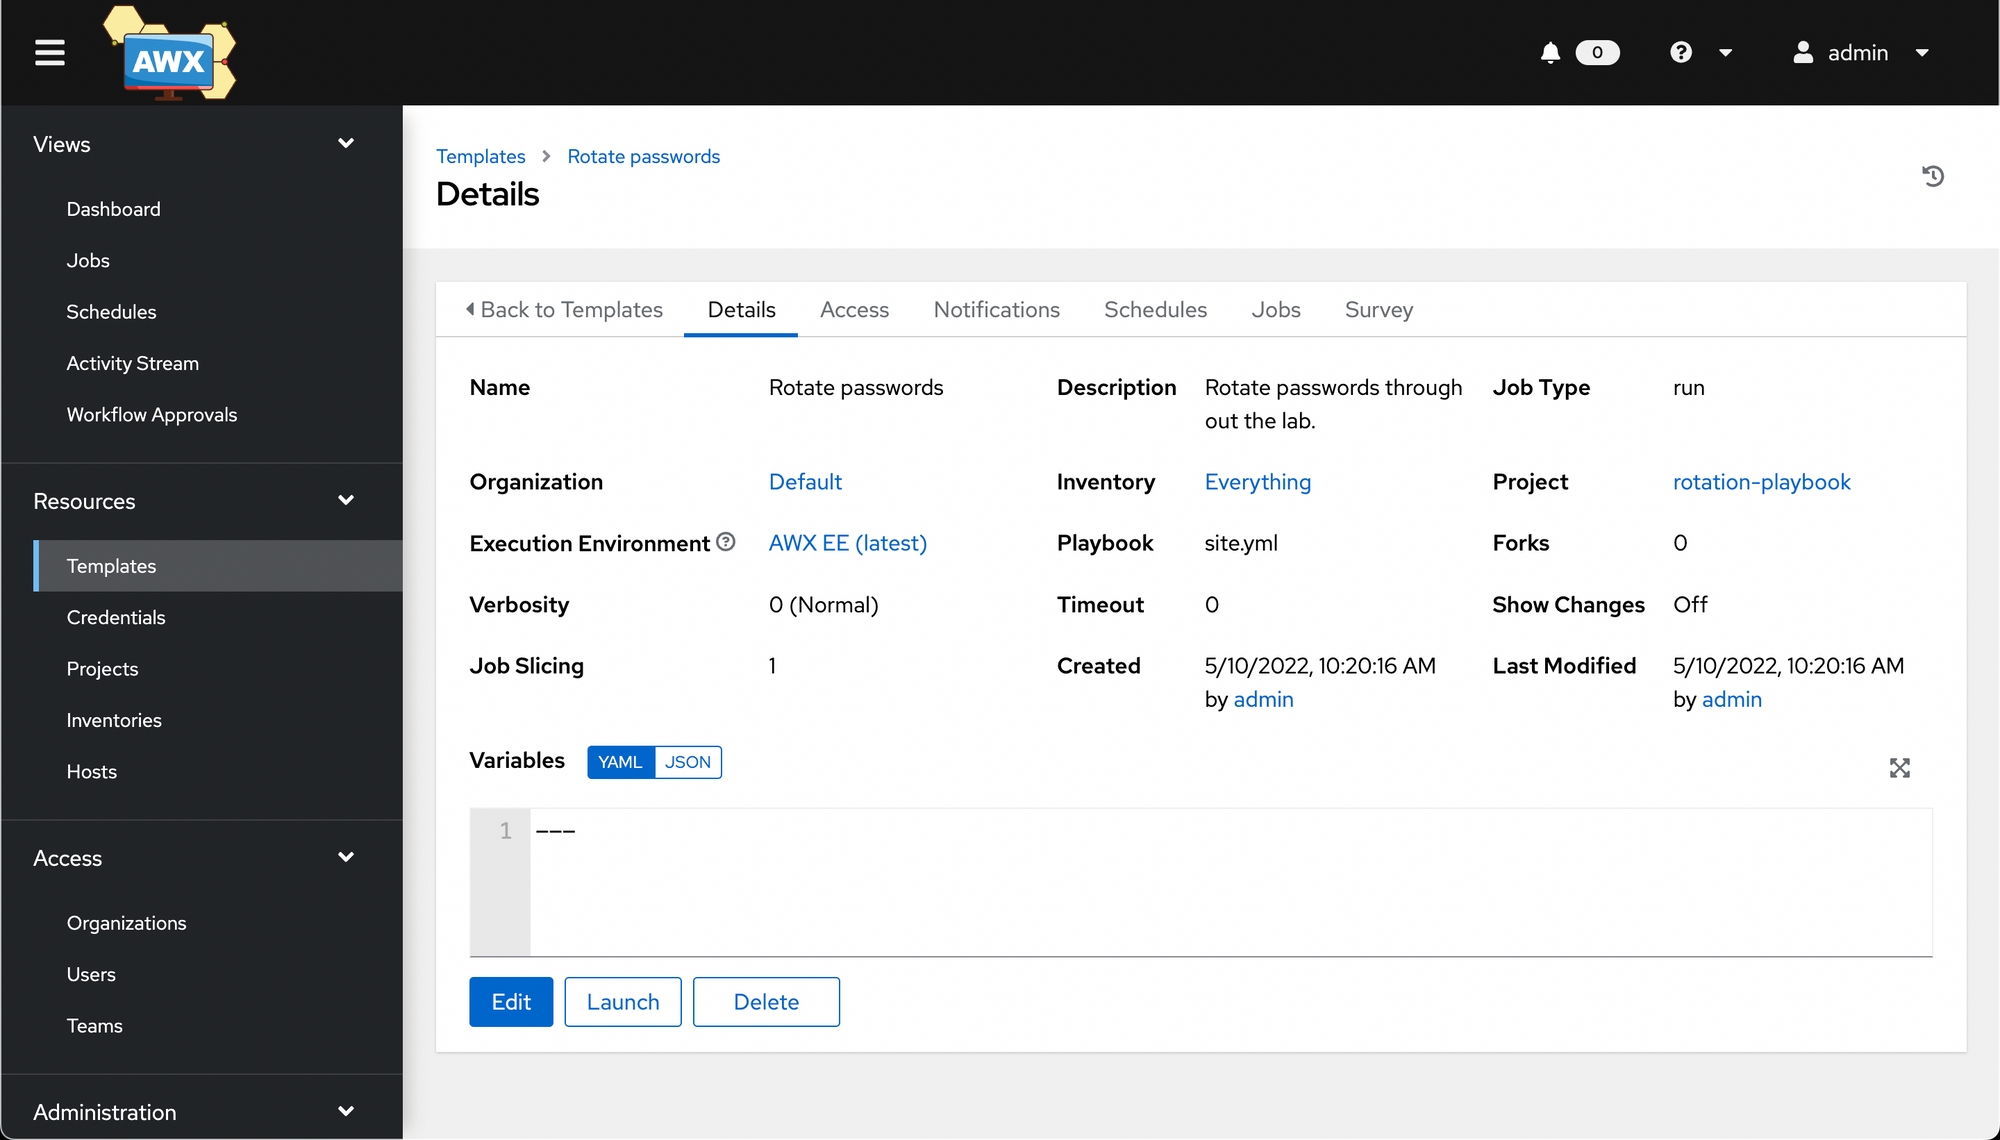
Save it, and you'll once again be taken to a Details screen.
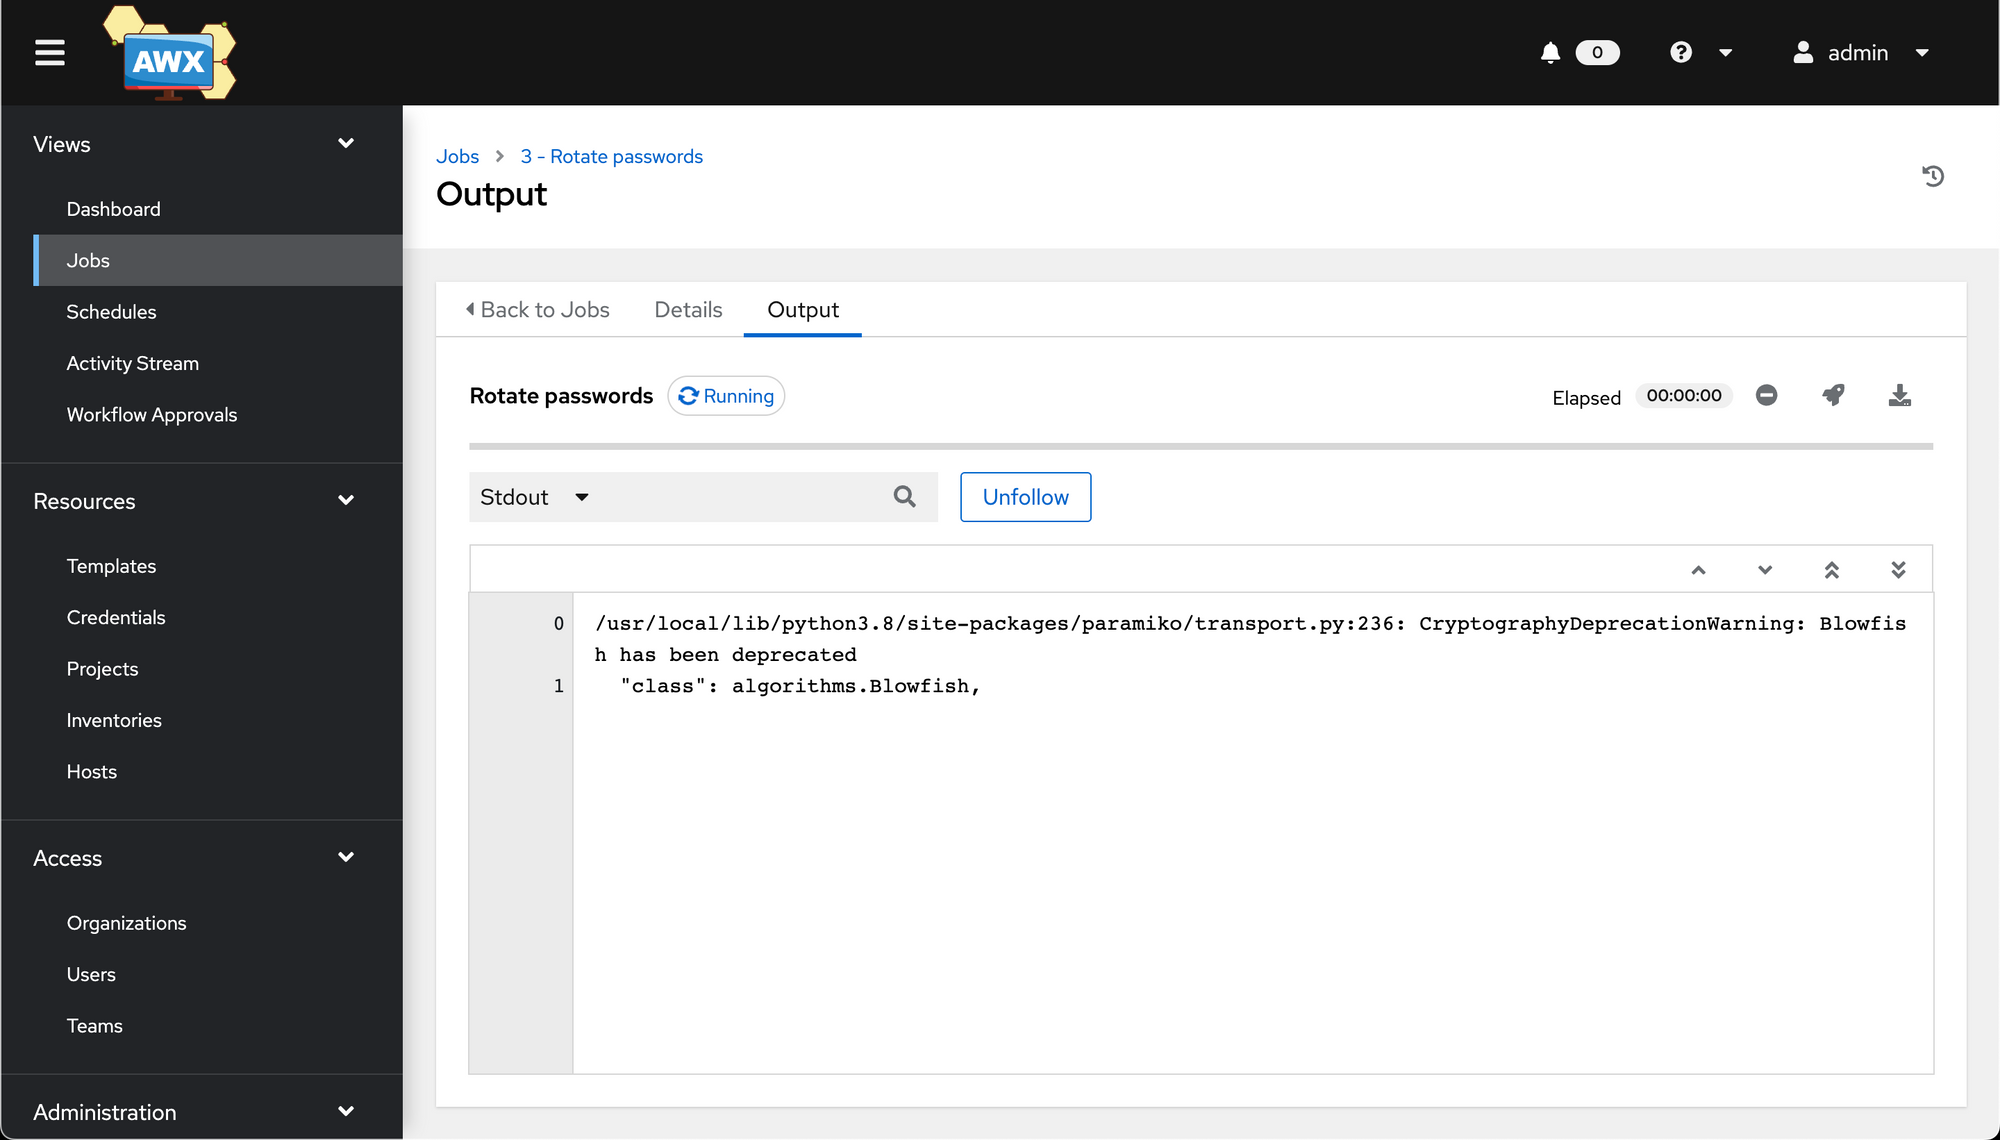
We can then launch the job, at which point we'll run into an interesting AWX limitation - it can't handle vars_prompt, which my chosen playbook uses to prompt for a new password to use.
We can get around this, however, by modifying the job template we just created and pre-setting any needed variables that vars_prompt would usually provide.
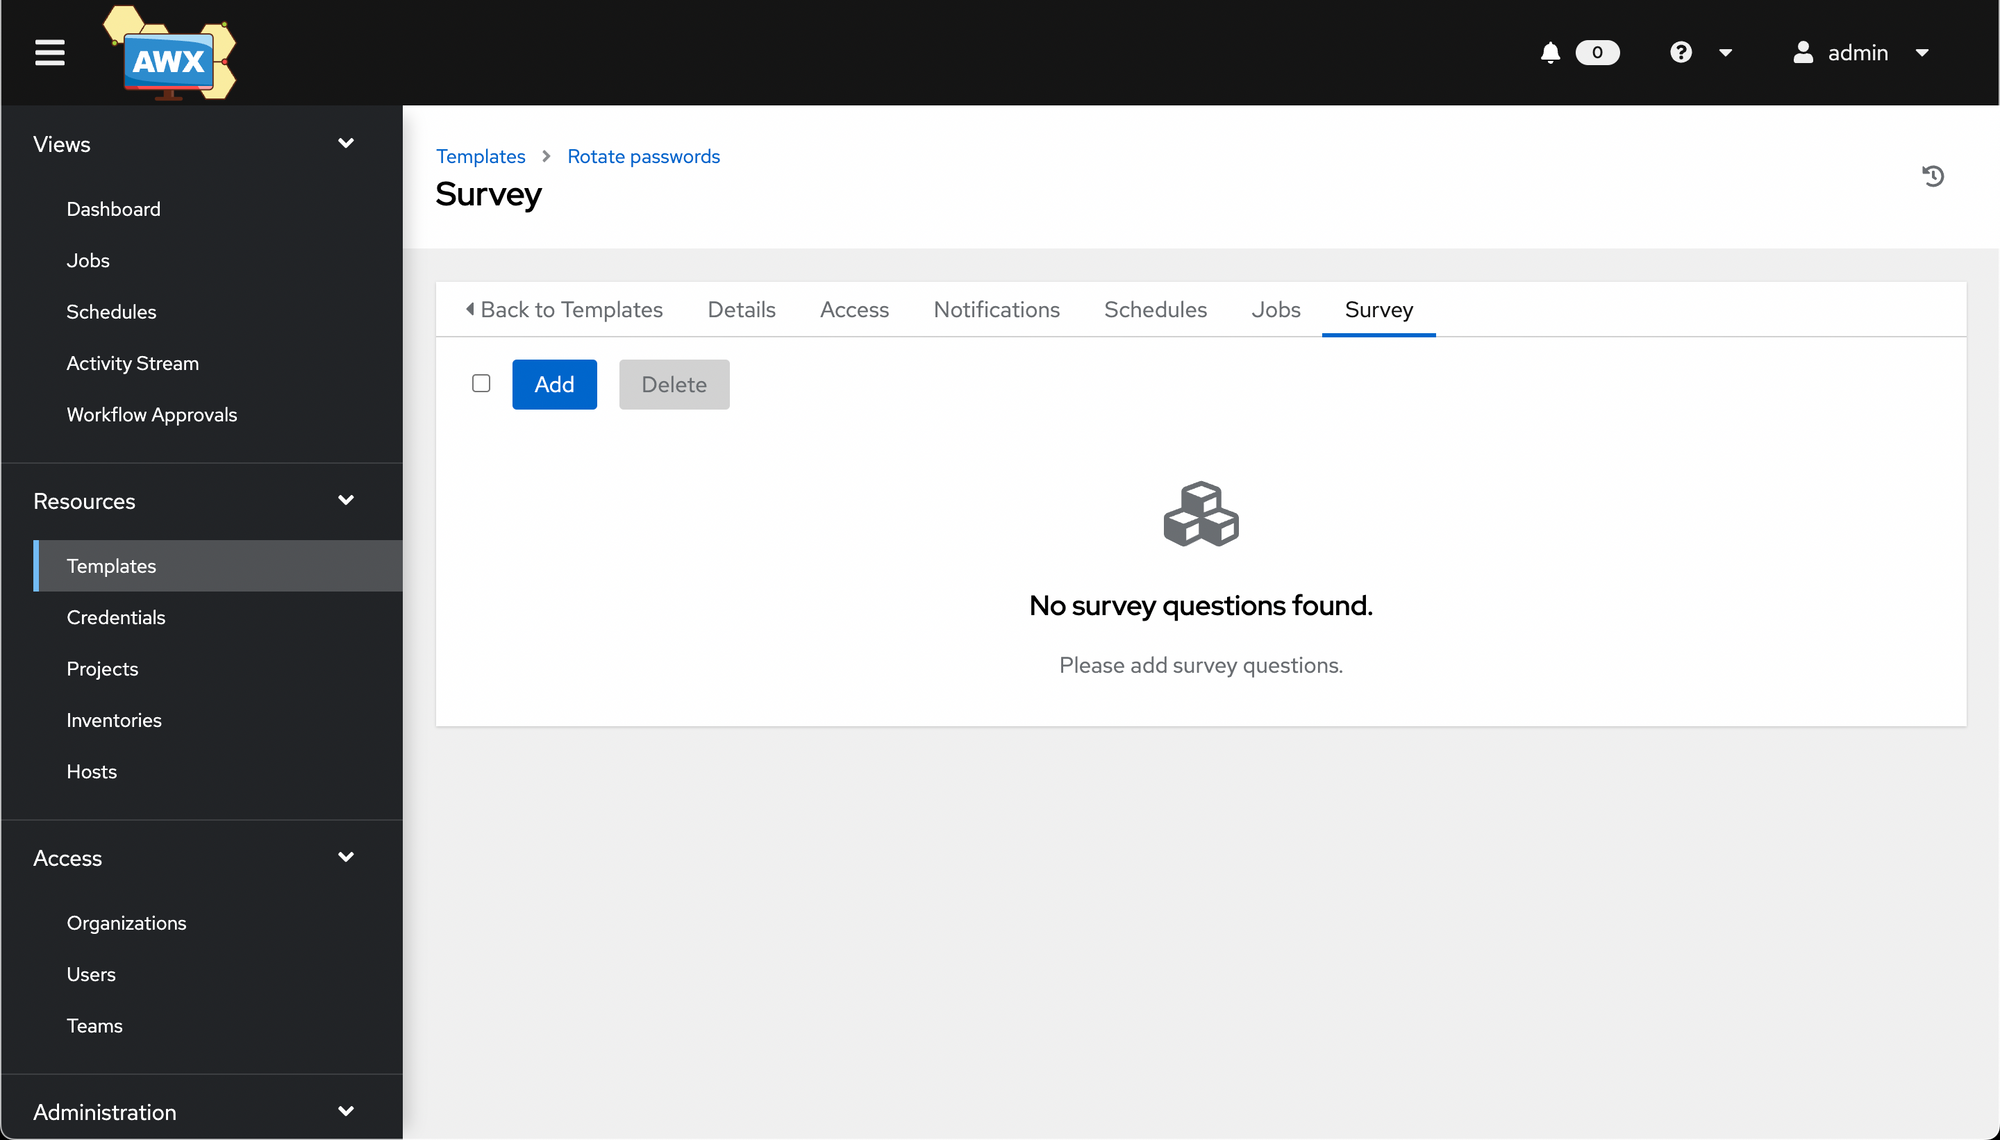
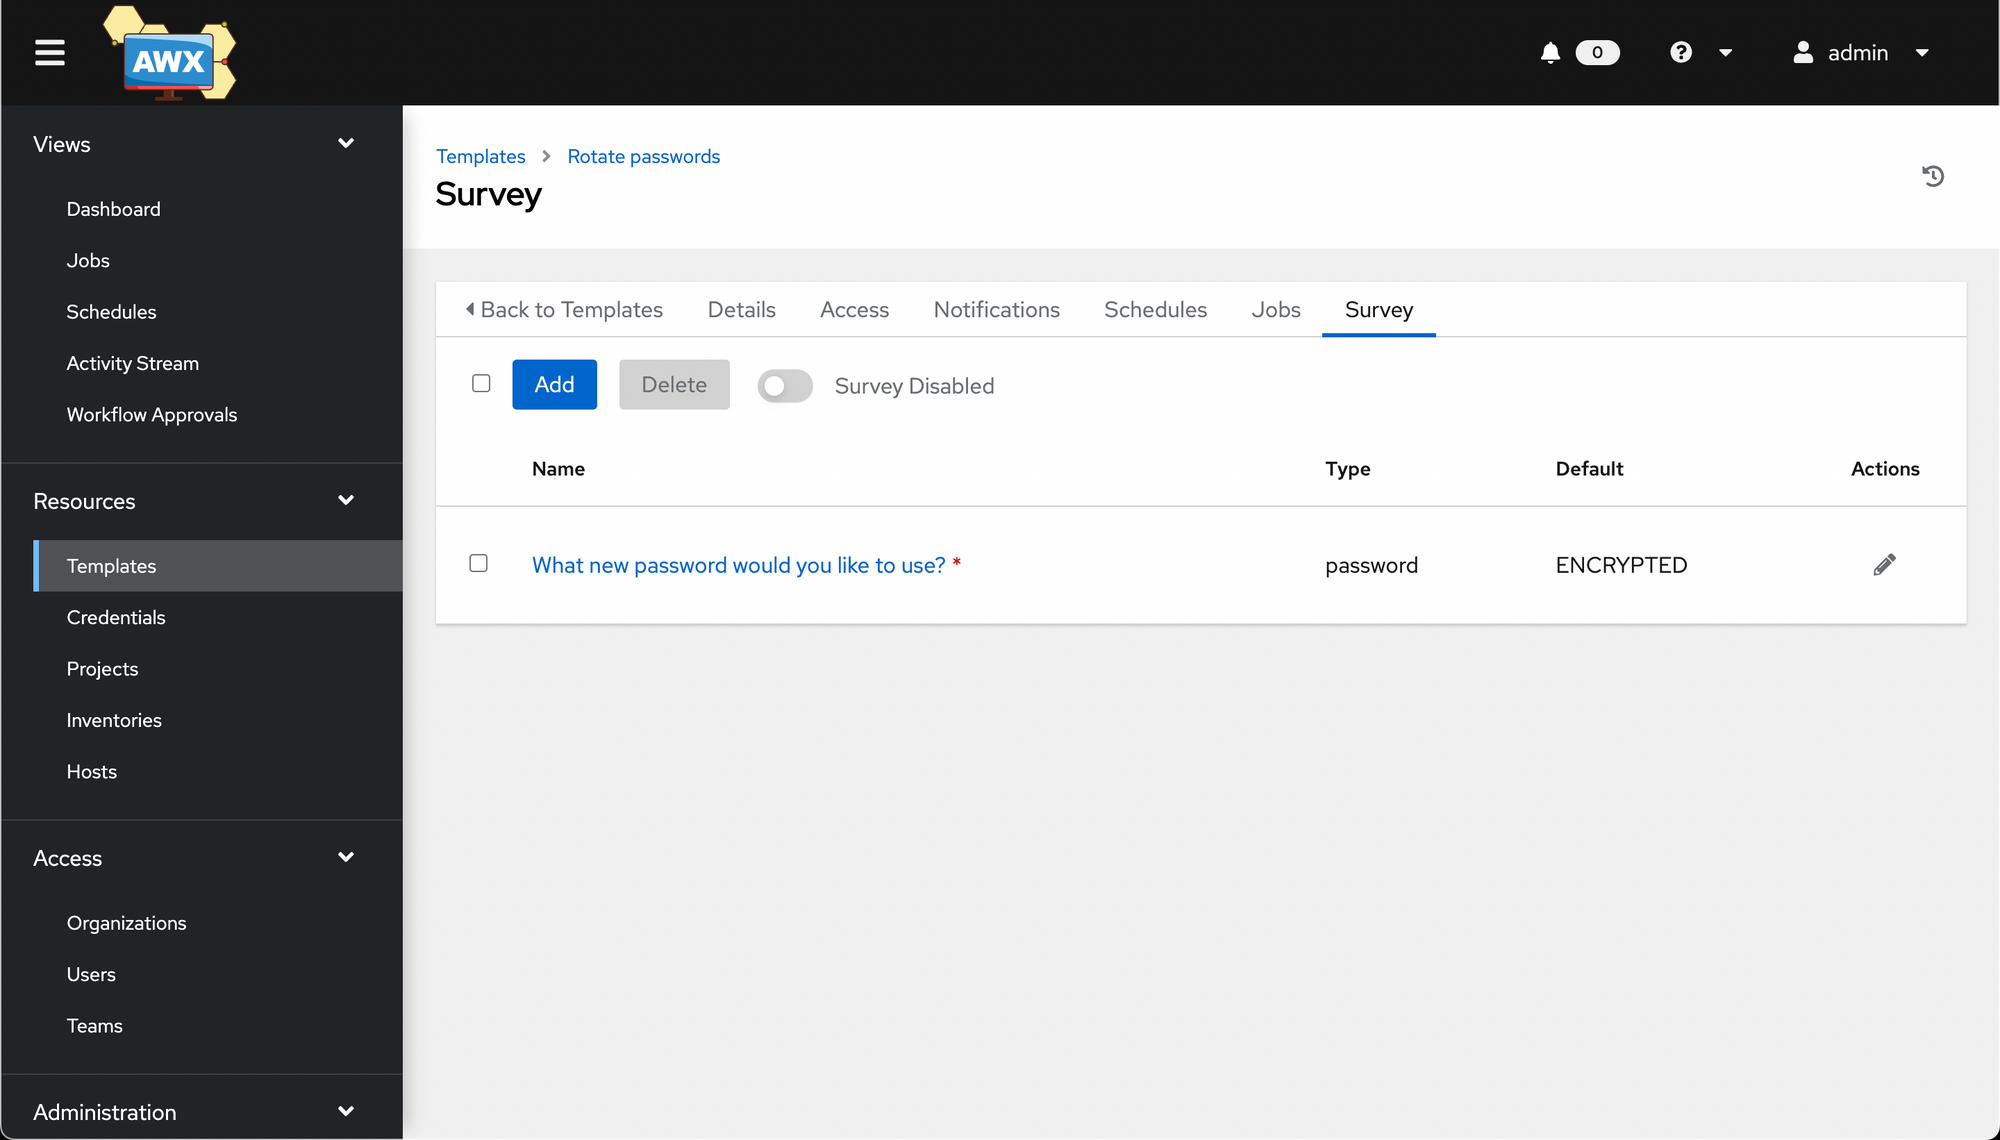
Go back to the job template, and click the Survey tab, then click Add.
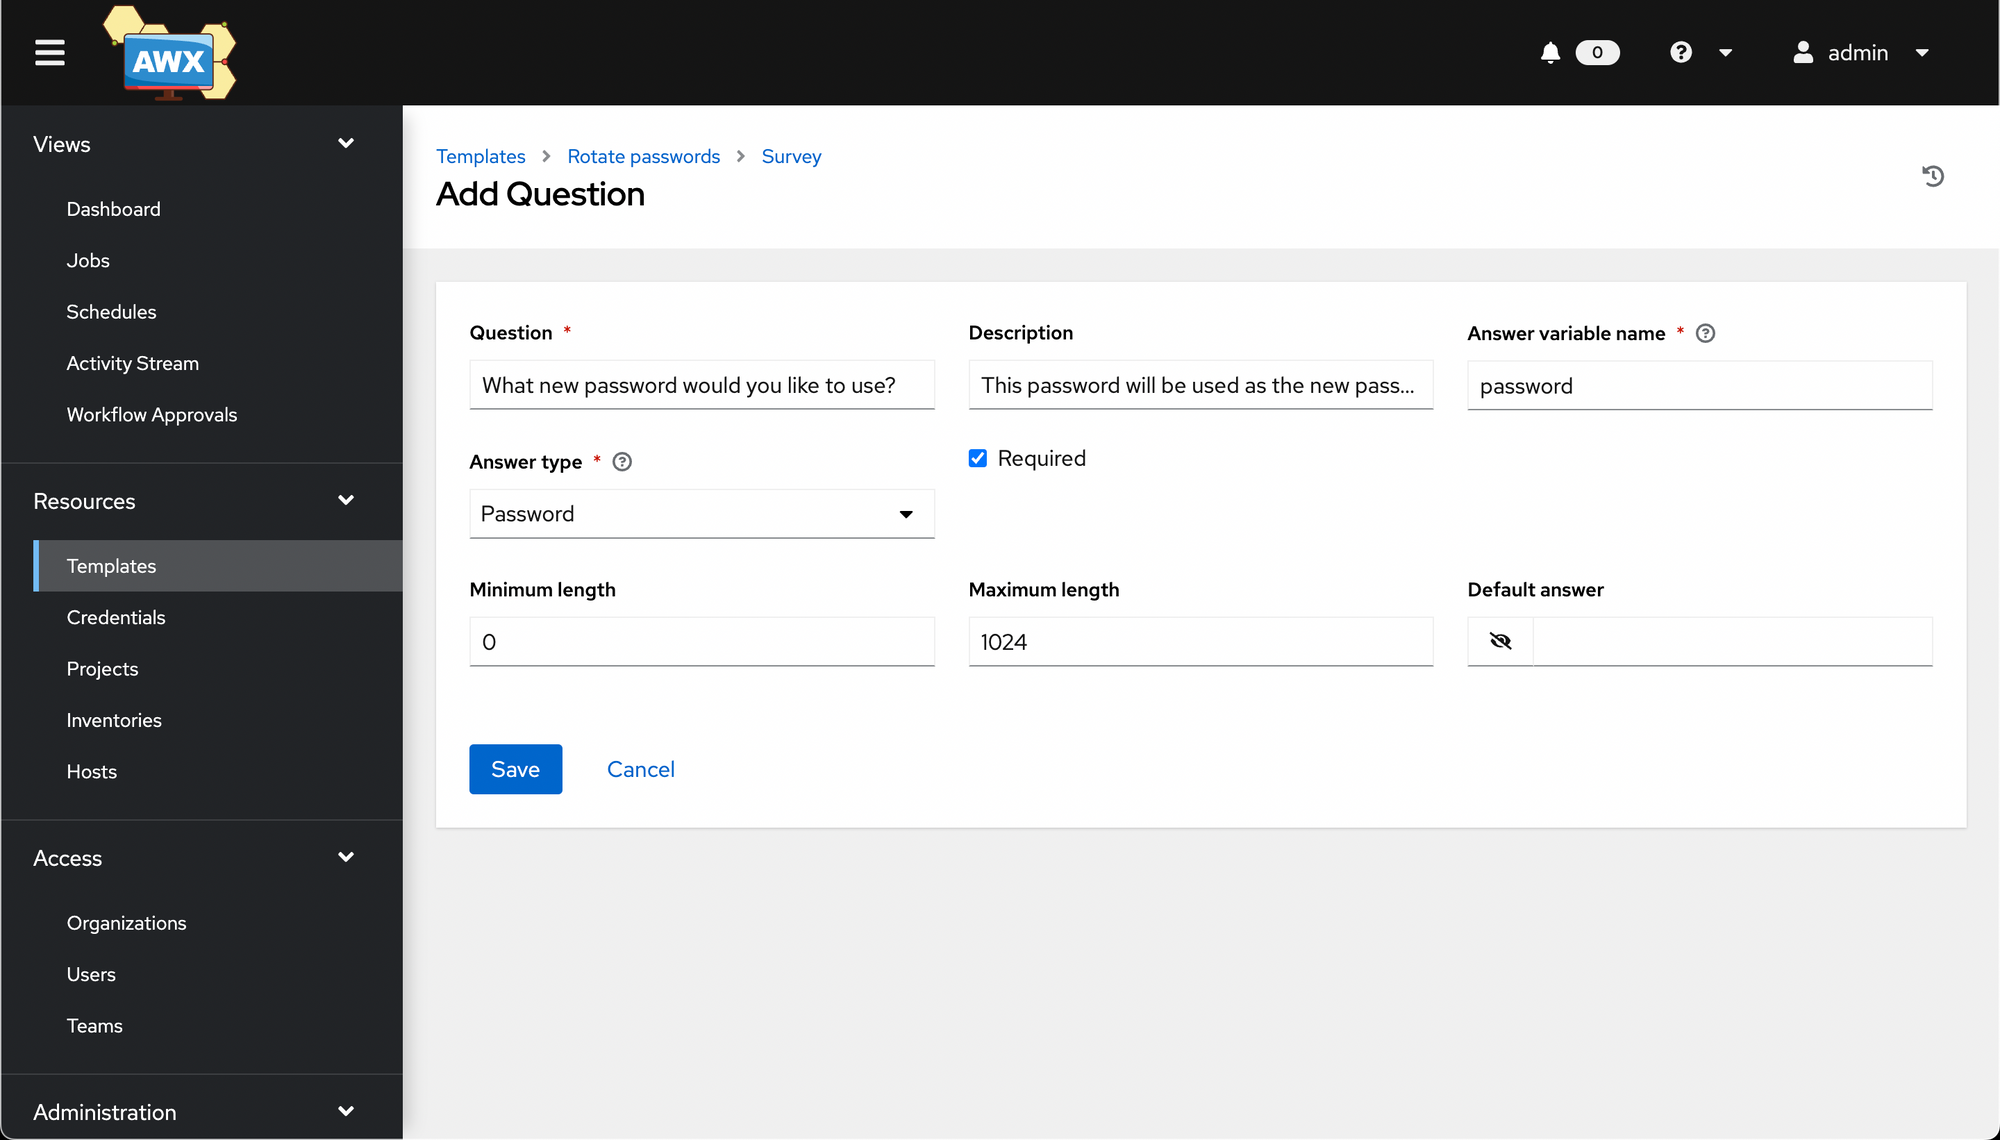
Fill in the question, then hit Save, making sure to set Answer variable name to match the variable name used in the playbook.
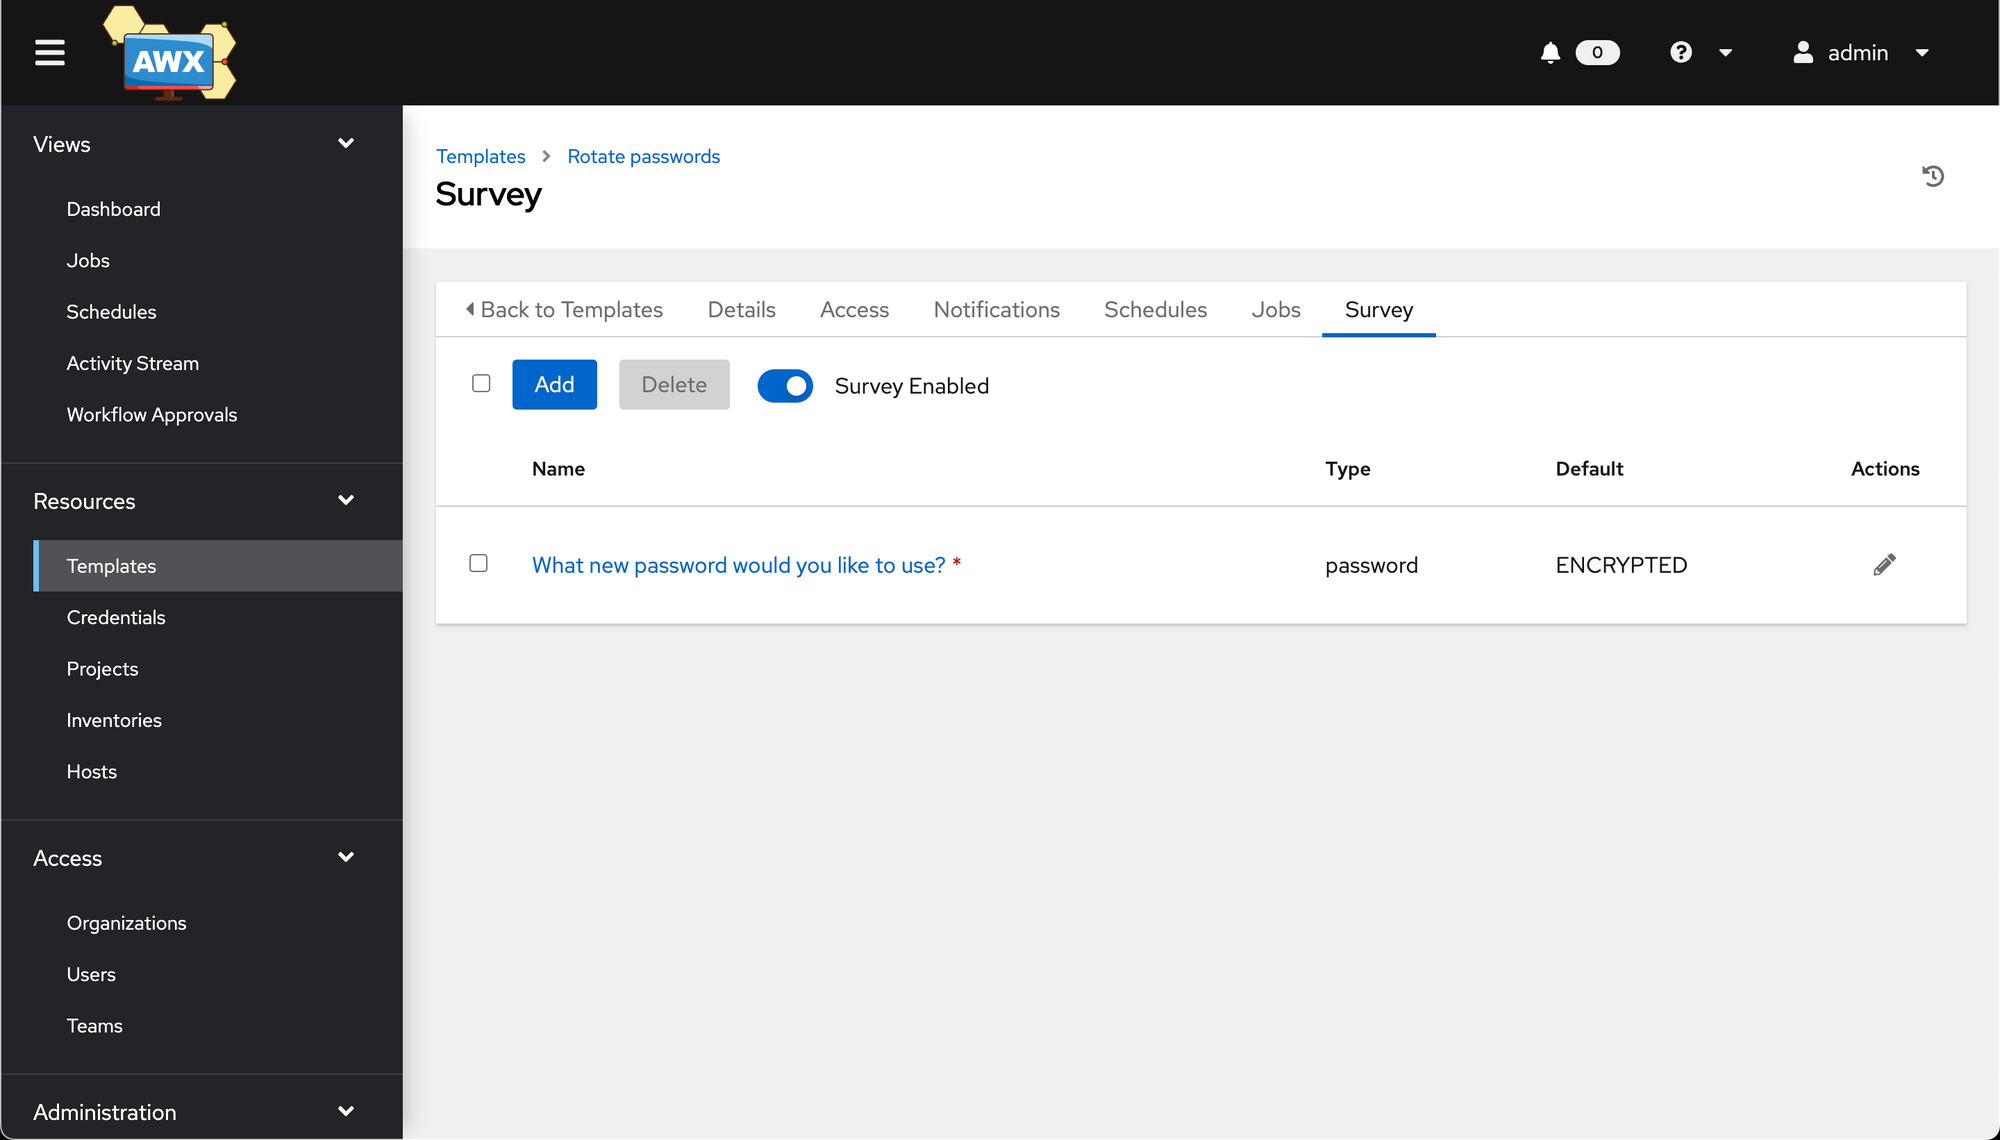
Once saved, you'll see the survey. Make sure to click the Survey Disabled toggle, to enable the survey.
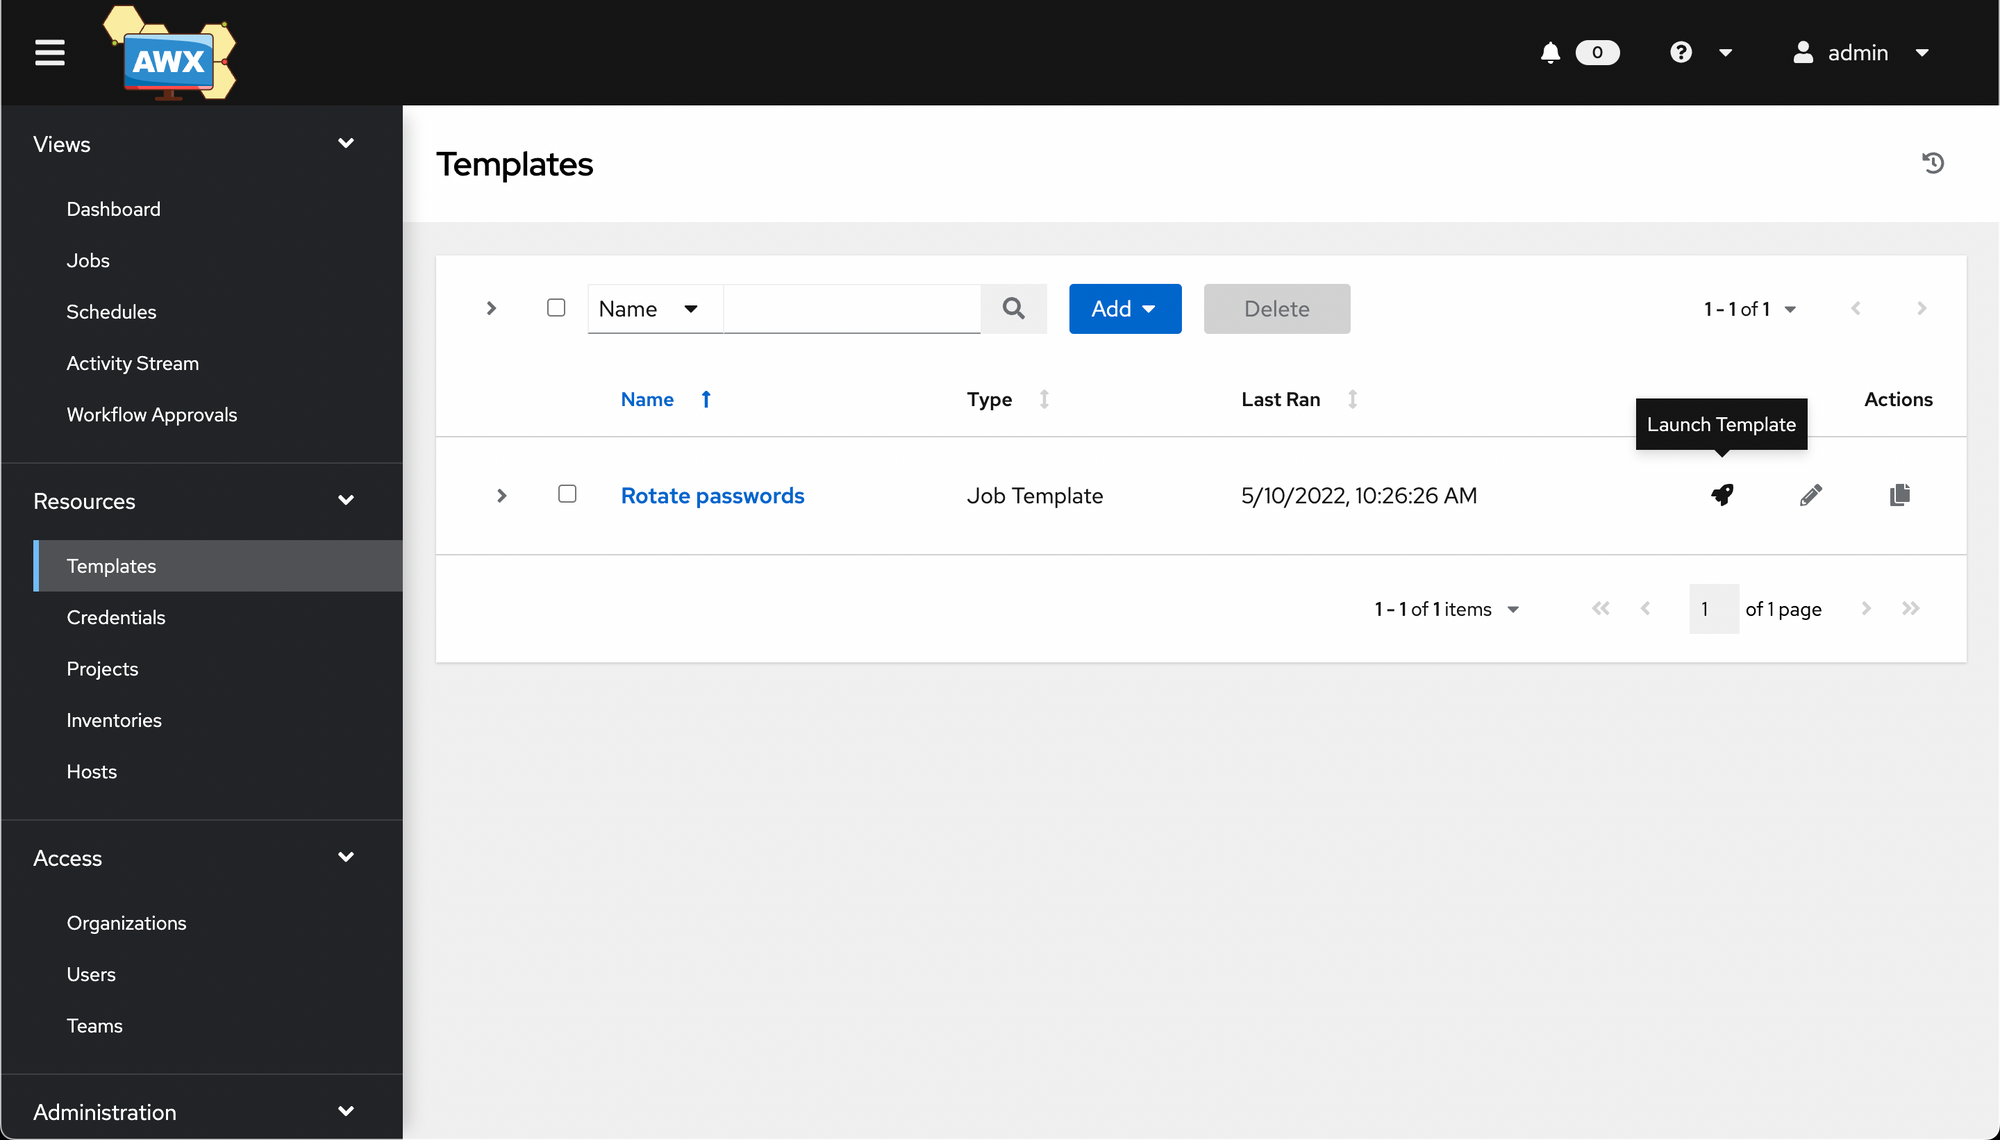
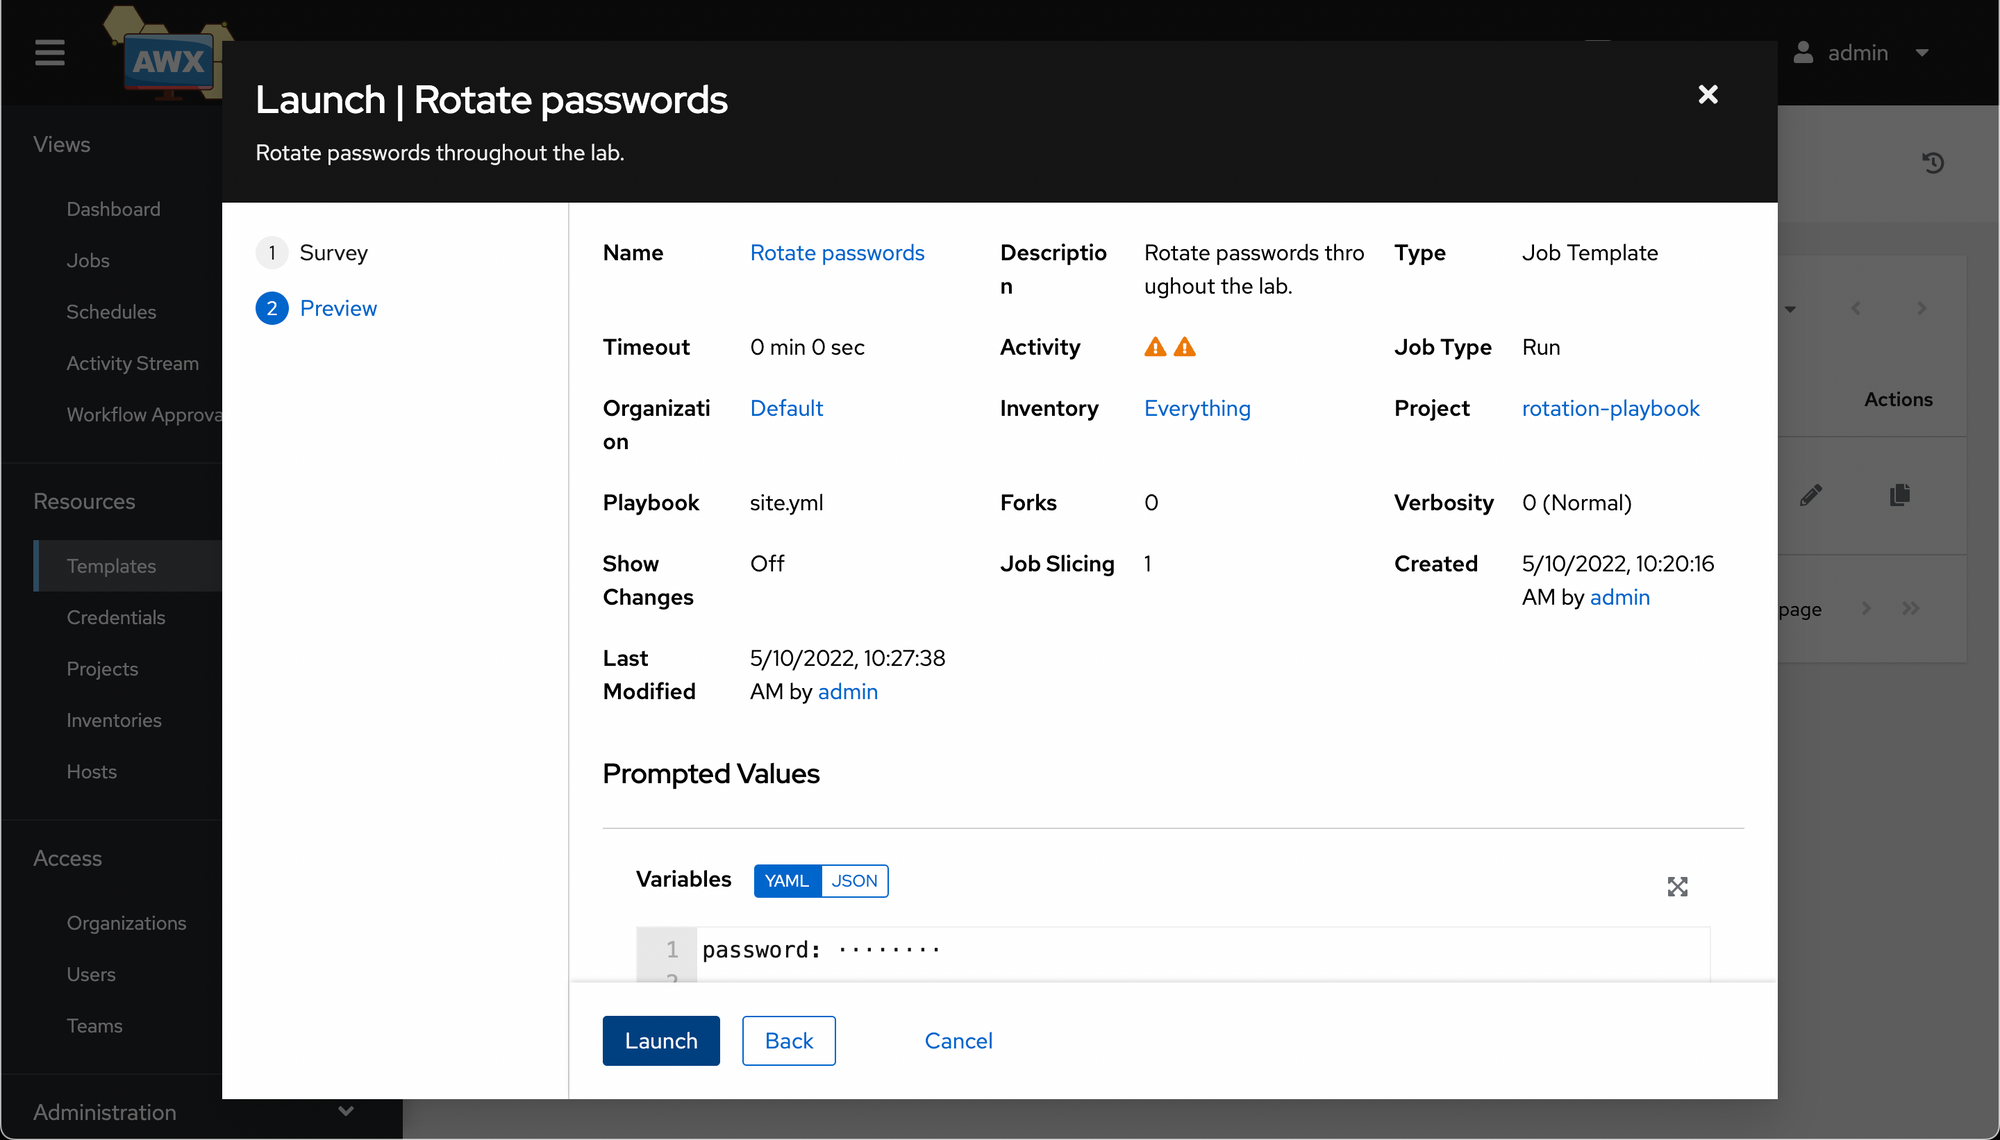
Now go to Resources -> Templates, find our job, and select the little rocket 🚀 icon.
This time when the job launches, it will ask you to fill out the form with required values before running.
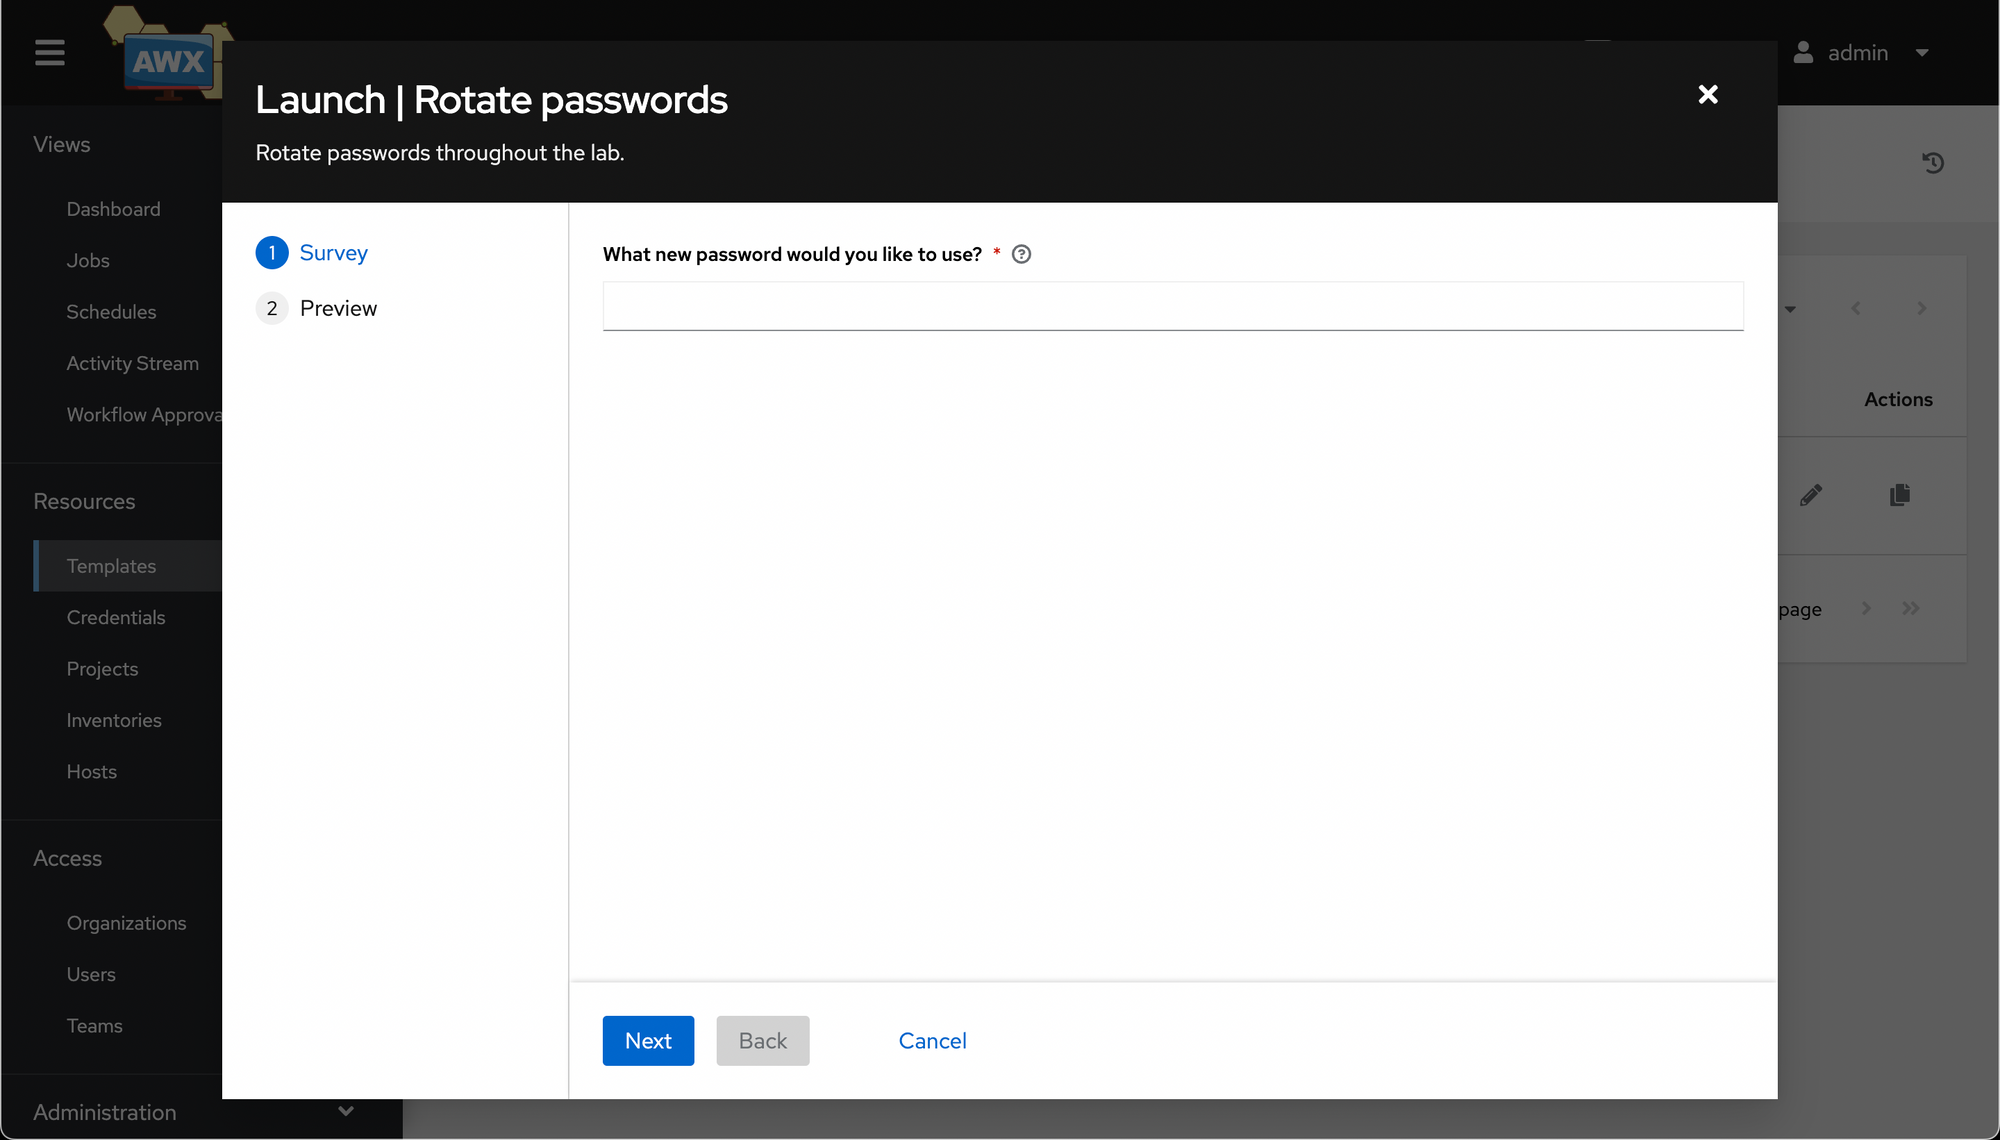
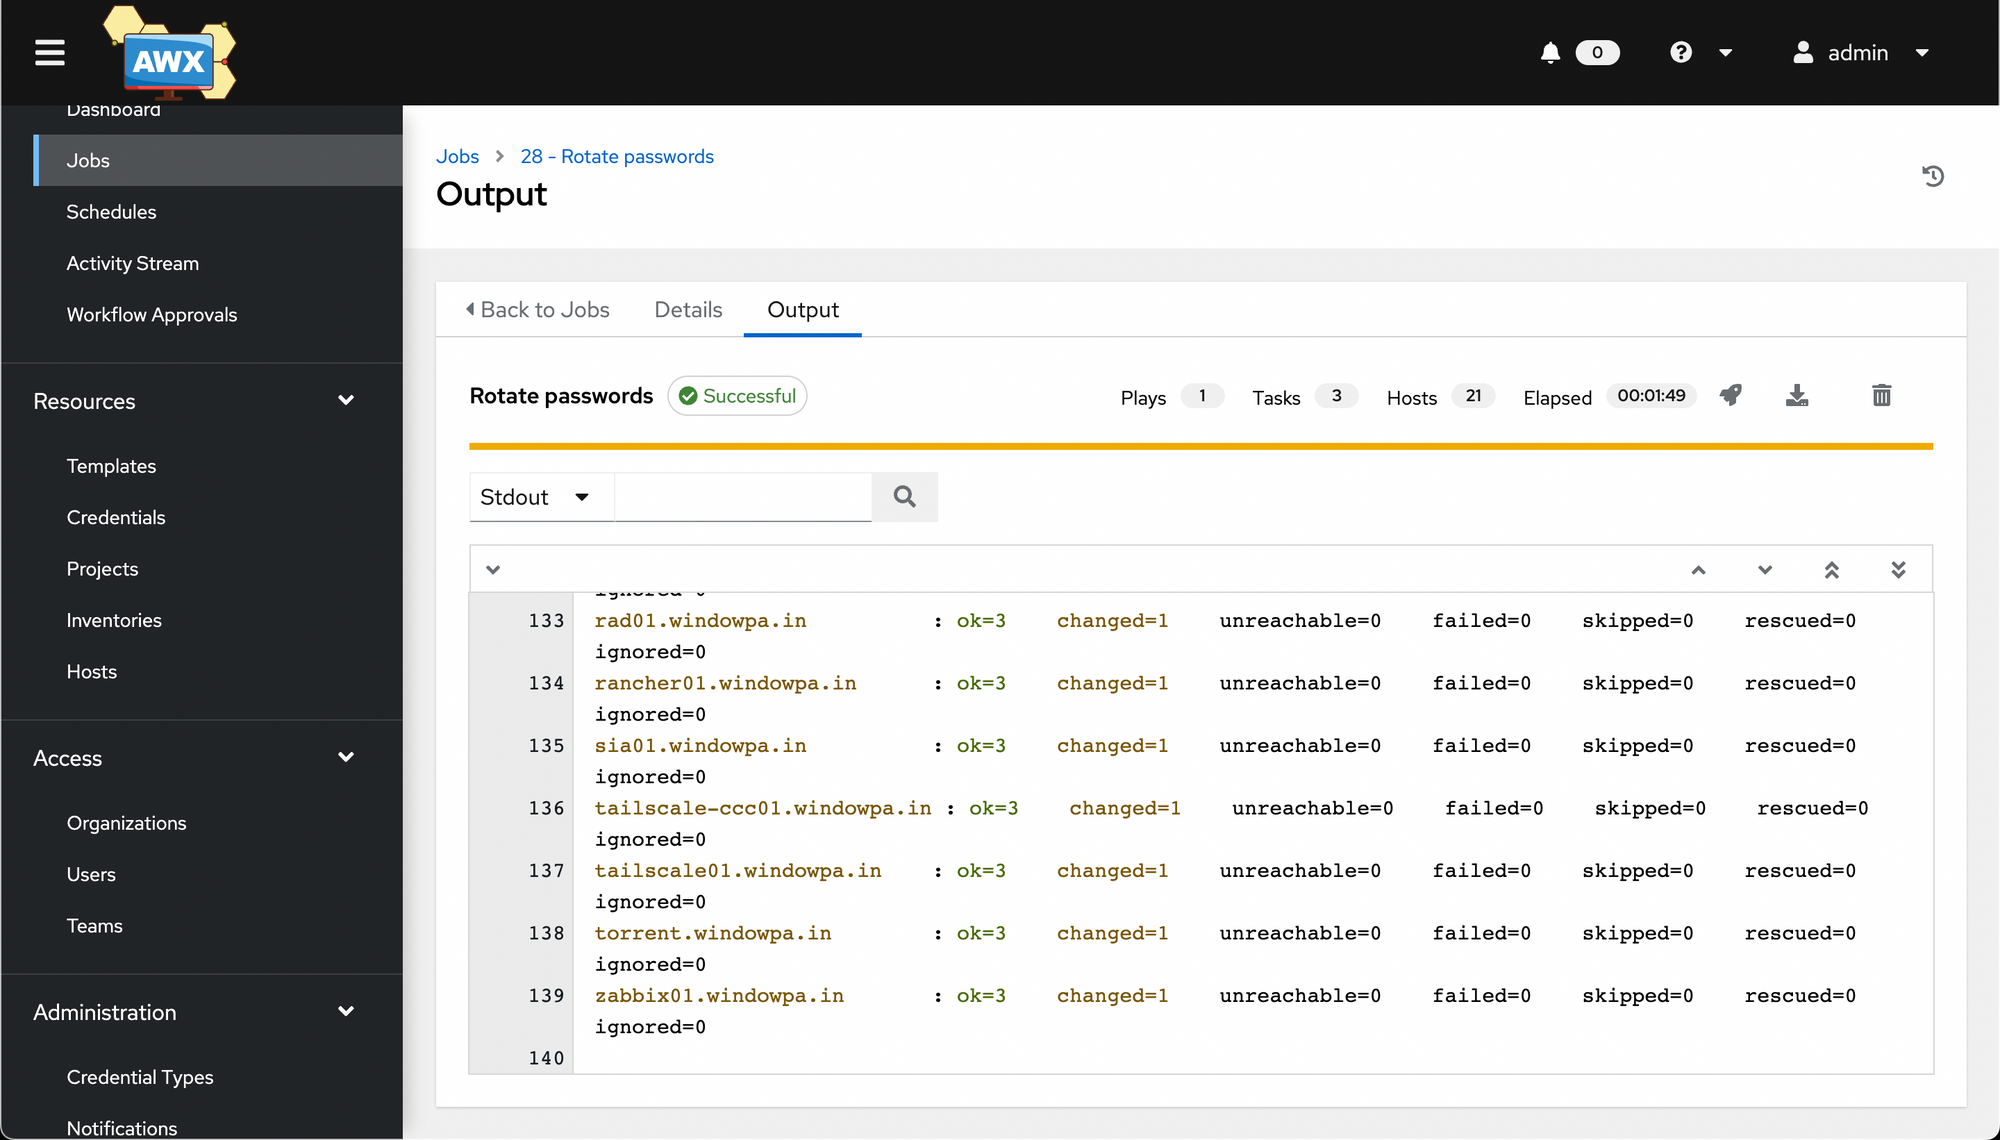
Once you hit Next, it'll prompt you to make sure you are happy with the options provided. Hit Launch and cross your fingers.
We have a successful playbook run!
And that's a quick introduction to AWX. You should now know how to set up a basic installation, create projects, inventories and job templates, and run jobs. We even briefly touched on Surveys.